When fall rolls in and the air smells like cinnamon and cozy sweaters, dessert cravings start calling but let’s be honest, most apple treats are loaded with sugar and don’t exactly help your goals. That’s where these High-Protein Apple Cheesecake Bars come in to save your sweet tooth and your macros.
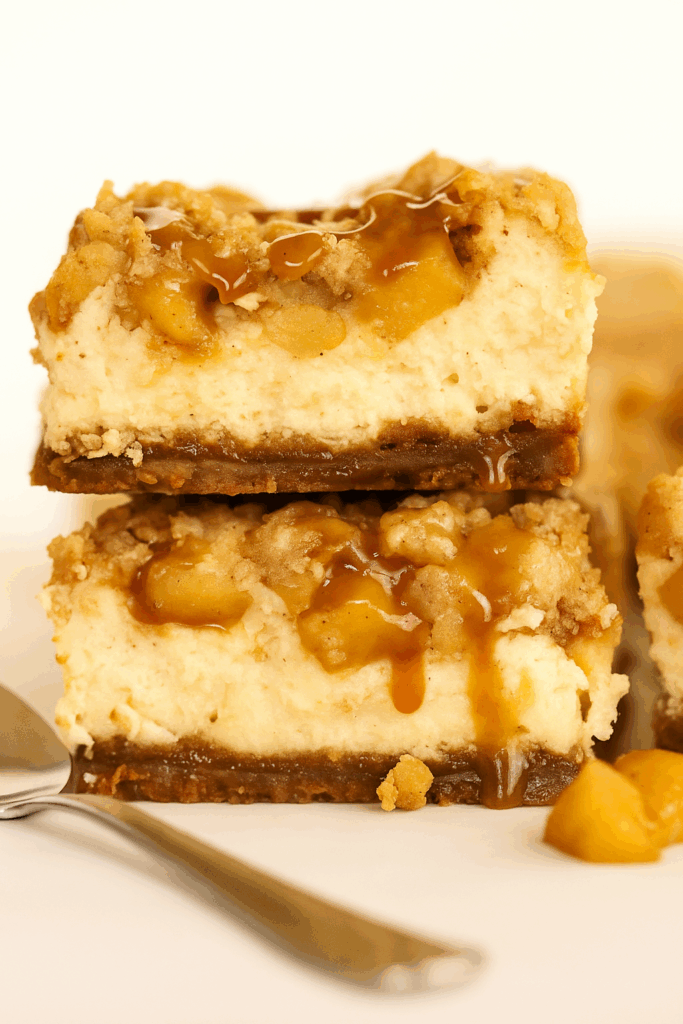
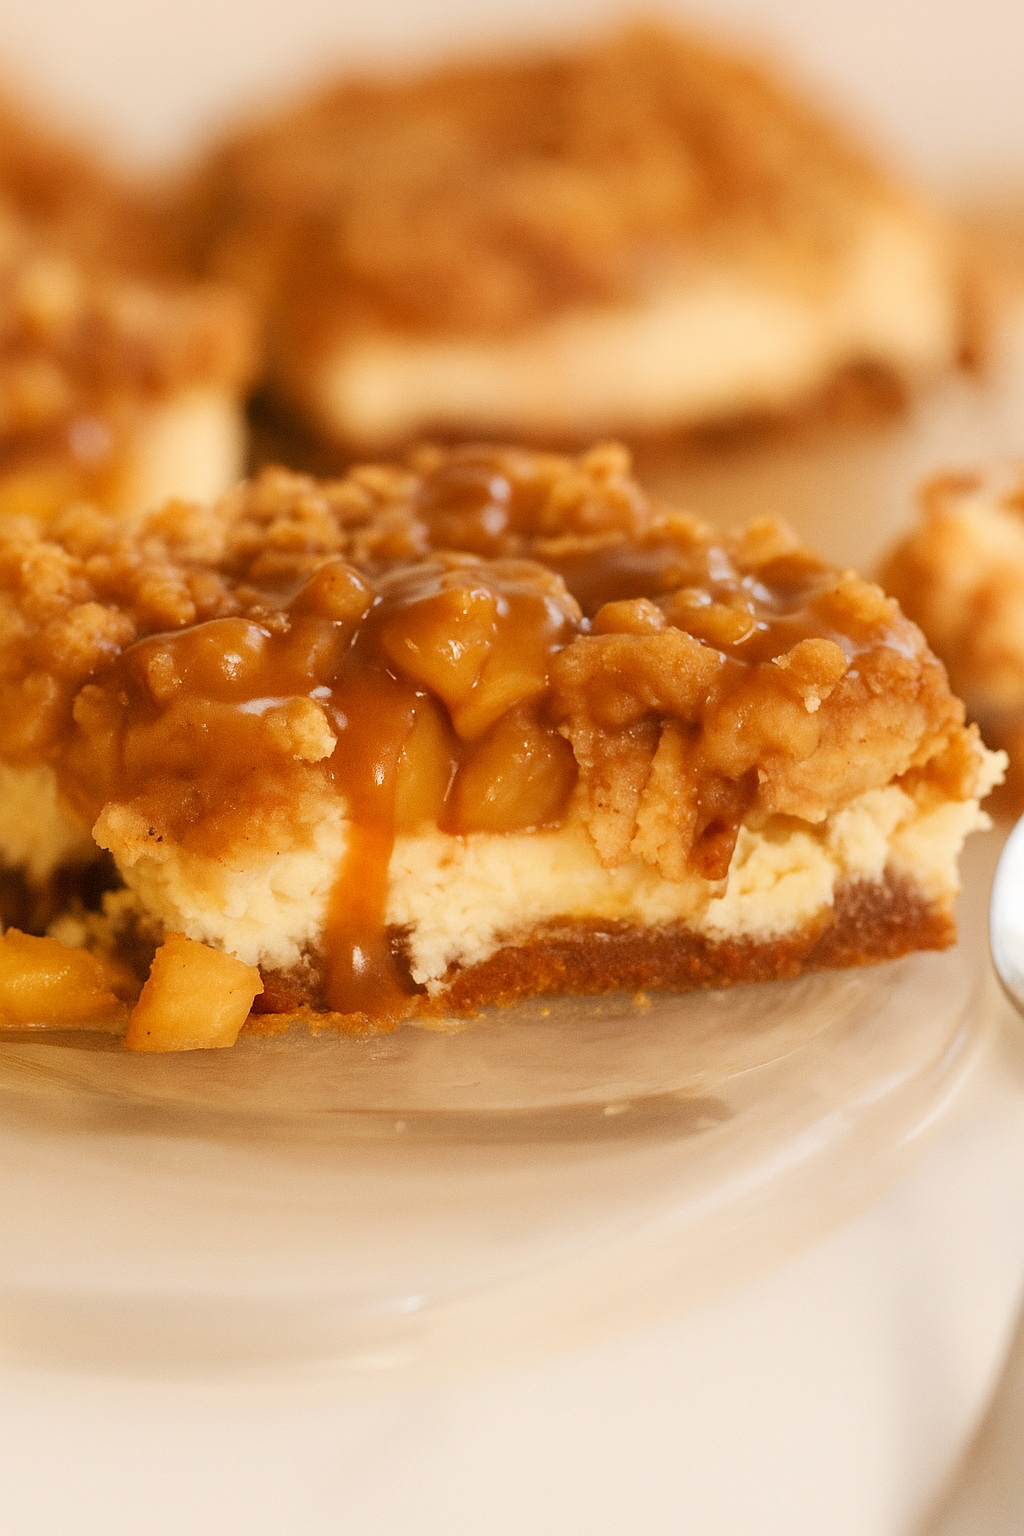
Imagine biting into a creamy cheesecake layer kissed with vanilla, soft cinnamon apples baked to golden perfection, and a buttery oat crumble that feels like a warm hug. Except this time, you’re fueling your body with 17 grams of protein, only 210 calories, and ingredients that love you back.
These bars are made for busy fall days, when you want something indulgent yet nourishing a dessert that works as a post-workout snack, afternoon pick me up, or meal prep breakfast. They’re proof you can enjoy the comfort of a homemade bakery treat without guilt or compromise.
Every bite is cozy, creamy, and just sweet enough so you’ll satisfy cravings while staying on track. Keep a batch in your fridge and feel that “I can do this” energy every time you reach for one.
Why You’ll Love This Recipe
- A Dessert That Loves You Back: These cheesecake bars taste like something straight from a bakery window silky cheesecake, spiced apples, and golden crumble yet they nourish you with 17 grams of protein and only 210 calories. No guilt, no compromise, just pure joy in every bite.
- Perfect Balance of Indulgence and Discipline: You don’t have to give up dessert to stay on track. This recipe gives you that comforting, fall-inspired treat you crave, while secretly helping you hit your protein and calorie goals effortlessly.
- Creamy, Cozy, and Crave-Worthy: The mix of cinnamon apples, vanilla cheesecake, and soft crumble makes every bite taste like autumn. It’s the kind of treat that satisfies your sweet tooth and soul.
- Meal Prep That Feels Luxurious: Bake once, chill overnight, and you’ve got grab and go snacks or breakfast bars that feel special no more plain protein bars or bland oats.
- Fuel for Body and Mind: Whether post-workout or as an afternoon pick me up, these bars keep you energized, focused, and happy proof that eating healthy can feel like self-care, not sacrifice.
Key Ingredients Breakdown
- Nonfat Greek Yogurt: The secret to a luscious, creamy cheesecake texture with a big protein boost and zero heaviness. It adds tang and moisture while replacing heavy cream and sour cream.
- Vanilla Whey Protein: Not just for the gym here it acts as a binding agent, adds subtle sweetness, and delivers that 17 g protein punch in every bar without sacrificing flavour.
- Apples (Fresh, Sweet, and Crisp): Naturally sweet and full of fiber, apples bring juicy bursts of flavour and the warm, cozy feeling of fall to every bite. Choose Honeycrisp or Fuji for the best texture.
- Light Cream Cheese: Gives the bars that dreamy, cheesecake richness we love smooth and velvety, but much lighter in fat than the traditional version.
- Unsweetened Applesauce: The quiet hero that keeps the crust and crumble soft, moist, and flavourful while cutting down on butter and added sugar.
- Cinnamon and Sugar-Free Maple Syrup: These two bring the comforting, caramelized sweetness of a classic apple dessert no refined sugar needed.
How to Make High-Protein Apple Cheesecake Bars
1. Prep your baking pan:
Line an 8×8-inch square pan with parchment paper, leaving a little overhang on the sides so you can lift the bars out easily later. Give it a quick spray with nonstick baking spray for extra insurance.
2. Mix the crumble base:
In a large bowl, combine your oat flour, vanilla protein powder, cinnamon, salt, and a touch of sweetener. Pour in the melted light butter and a splash of vanilla extract. Stir with a fork until the mixture forms a soft, crumbly dough. Press about two-thirds of this mixture firmly into the bottom of your prepared pan to form the crust. Reserve the rest for the topping.
3. Make the cheesecake layer:
In another bowl, beat together the light cream cheese, nonfat Greek yogurt, maple syrup (or your preferred sweetener), egg, and a dash of vanilla until silky smooth.Pour this creamy cheesecake mixture over the crust and spread it out evenly with a spatula.
4. Prepare the apple topping:
Peel and finely dice your apples, then toss them in a small bowl with cinnamon, a sprinkle of sweetener, and a tiny squeeze of lemon juice. Stir until the apples are well-coated and fragrant. Gently spoon this apple mixture over the cheesecake layer, spreading it evenly so every bite gets a bit of apple.
5. Add the crumble topping:
Take the reserved crumble dough and sprinkle it over the apples, pressing down gently so it sticks but still looks rustic and cozy.
6. Bake to golden perfection:
Slide your pan into a preheated 350°F (175°C) oven and bake for 35-40 minutes, or until the top is golden and the edges are just set. The center should still have a slight jiggle it’ll firm up as it cools.
Serve
7. Cool and chill:
Let the bars cool completely at room temperature, then transfer the pan to the fridge for at least 2-3 hours (or overnight if you can wait). This step helps the cheesecake layer set perfectly.
8. Slice and serve:
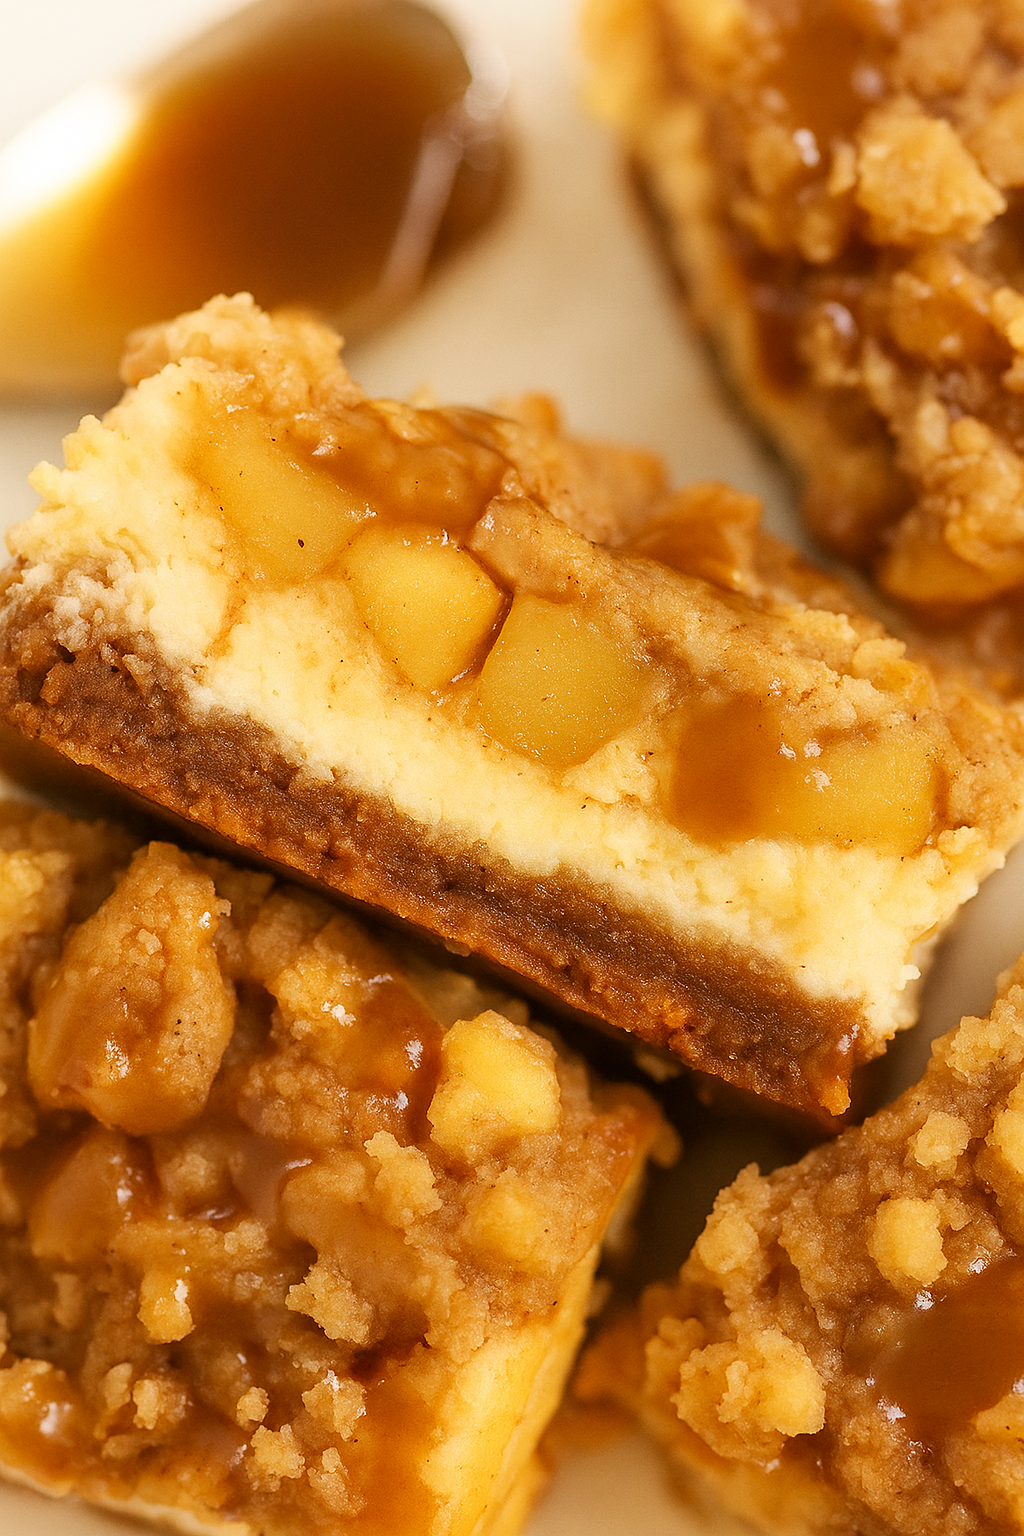
Lift the bars out using the parchment paper, slice them into 9 squares, and admire the layers soft cinnamon apples, creamy cheesecake, and that golden protein crumble. Enjoy cold from the fridge for a snack, dessert, or even a high-protein breakfast treat!
Abby’s Real Talk
I’ll be honest with you I’ve always loved apple desserts, especially during the cozy months when the air smells like cinnamon and comfort. But every time I used to make classic cheesecake bars, I’d get that mix of joy and guilt. You know the feeling? That little voice saying, “This tastes amazing but it’s probably not the best choice.”
That’s exactly why I created these High-Protein Apple Cheesecake Bars. I wanted something that gave me that warm, bakery-style comfort without the sugar crash or heavy calories. The first time I took a bite after letting them chill overnight, I couldn’t believe how good they were sweet apples, creamy cheesecake and that crumbly, buttery top.
It’s the kind of treat I make on Sunday nights, cut into squares, and keep in the fridge for those midweek cravings. No guilt, no second thoughts just pure satisfaction knowing I’m nourishing my body and my soul.
If you’ve ever wanted dessert that loves you back, this one’s it. Promise.
Storage & Meal Prep Tips
- Fridge Storage: Once your cheesecake bars have fully cooled and set, slice them into squares and store them in an airtight container. Keep them in the fridge for up to 5 days. The flavour actually gets better by day two as the apples and spices settle in.
- Freezer Friendly: These bars freeze beautifully! Wrap each bar individually in parchment paper, then place them in a freezer-safe bag or container. They’ll stay fresh for up to 2 months. To enjoy, just thaw overnight in the fridge or pop one in the microwave for 15-20 seconds if you want that warm, cozy flavor.
- Meal Prep Hack: Bake a batch on Sunday and divide into single servings. Store 1-2 bars per container with a small drizzle of sugar free maple syrup on the side perfect for grab and go breakfasts or protein packed snacks.
- Serving Tip: They taste incredible cold, but for a more indulgent feel, warm one slightly and top with a spoonful of Greek yogurt or a sprinkle of cinnamon.
Shop This Recipe
To make these High-Protein Apple Cheesecake Bars extra easy (and foolproof), here are the exact tools and ingredients I personally recommend and use in my kitchen. These are all available on Amazon they make baking smoother, faster, and more enjoyable.
- 9×9 Baking Pan – A nonstick square baking pan helps your cheesecake bars bake evenly and release cleanly. I love this USA Pan 9×9 Inch Square Pan because it’s heavy-duty and easy to clean.
- Food Processor – Perfect for blending your crust ingredients and achieving that buttery, crumble-like texture without over mixing. Try the Hamilton Beach Food Processor it’s affordable and powerful.
- Mixing Bowls – A set of large and small bowls helps keep your crust, cheesecake layer, and apple topping organized. These Stainless Steel Mixing Bowls with Lids are durable and space-saving.
- Hand Mixer – To whip your creamy cheesecake filling to perfection, the KitchenAid 5-Speed Hand Mixer is a dream tool lightweight yet powerful.
- Protein Powder – For that signature high-protein boost, I love using Vanilla Whey Protein Powder for its creamy flavor and smooth blend.
Each tool and ingredient listed above makes the process more seamless and ensures your bars come out bakery-level delicious.
Disclaimer: As an Amazon Associate, I earn from qualifying purchases at no extra cost to you. I only recommend products I truly use and love in my kitchen.
FAQ Section
Can I make these cheesecake bars dairy-free?
Yes! You can easily swap the Greek yogurt and cream cheese for dairy-free alternatives like almond based or coconut based yogurt and vegan cream cheese. Just note that texture may be slightly softer, but the flavour stays deliciously cozy.
What’s the best protein powder to use?
A high-quality vanilla whey protein works best for flavour and texture. If you’re vegan, try a vanilla pea protein blend just add a splash of extra milk if the batter feels too thick since plant-based powders absorb more liquid.
Can I make these bars ahead of time?
Absolutely! These are perfect for meal prep. You can bake them up to 2 days ahead and store them in the fridge. In fact, they taste even better the next day once the flavours settle.
Can I use a different fruit instead of apples?
Yes, you can! Pears or peaches work wonderfully if you want to switch up the fall vibe. Just make sure to adjust sweetness depending on the fruit.
How do I know when the bars are done baking?
The cheesecake layer should look set around the edges but still a bit soft in the center. It’ll continue firming up as it cools. Don’t overbake that’s the secret to a creamy texture.

Nutrition Information (Per Bar)
Serves: 12 bars
- Calories: 210
- Protein: 17 g
- Carbohydrates: 19 g
- Fat: 6 g
These macros make each bar a perfectly balanced snack or dessert high in protein to keep you full, lower in calories for a lighter treat, and still rich in cozy fall flavour. It’s the ultimate healthy twist on a classic apple cheesecake bar.
Thank you so much for baking along with me! These High-Protein Apple Cheesecake Bars are truly one of my favorite ways to enjoy a cozy, fall-inspired dessert that fits perfectly into a healthy lifestyle. Every bite tastes like comfort, but with a nourishing twist your body will love.
If you make this recipe, I’d love to hear from you drop a comment below and let me know how yours turned out! Did you add your own twist or swap in a different fruit? Your feedback helps others and inspires more delicious, guilt-free treats.
And if you enjoyed this recipe, don’t forget to share it with a friend or save it to Pinterest so you can come back anytime. Let’s make healthy desserts something to crave, not compromise.
High-Protein Apple Cheesecake Bars
Equipment
- 8×8-inch square baking pan
- Parchment paper
- nonstick spray
- Mixing bowls
- hand mixer or whisk
- Measuring cups & spoons
- Spatula
- nonstick skillet
- rubber spatula
- Sharp knife
Ingredients
Crust
- ¾ cup oat flour (75 g)
- 1 scoop vanilla whey protein (30 g)
- 2 tbsp unsweetened applesauce (30 g)
- 1 tbsp light butter or coconut oil, melted (10–12 g)
- 2 tbsp monk fruit erythritol blend (or preferred granular sweetener)
- 1 tsp ground cinnamon
- pinch of girl
- 1-2 tbsp unsweetened almond milk (only if needed to bind)
Cheesecake layer
- 8 oz light cream cheese softened (225 g)
- ¾ cup nonfat Greek yogurt (170 g)
- 1 scoop vanilla whey protein (30 g)
- 2 eggs white (large)
- 2-3 tbsp monk fruit sweetener (adjust to taste)
- 1 tsp vanilla extract
- pinch of salt
Apple layer
- 2 medium apples peeled and diced (about 260 g total) Fuji or Honeycrisp recommended for texture
- 1 tsp ground cinnamon
- 1 tbsp sugar-free maple syrup or monk fruit syrup
- 1 tsp lemon juice
- Pinch of nutmeg (optional)
Crumble topping
- ½ cup rolled oats (50 g)
- 1 scoop vanilla whey protein (30 g)
- 1 tbsp almond flour
- 1 tbsp unsweetened applesauce
- 1 tbsp sugar-free maple syrup or monk fruit syrup
- 1 tsp ground cinnamon
- 1 tbsp light butter or coconut oil, melted (10–12 g)
Instructions
Step 1 – Prep pan and preheat oven
- Preheat the oven to 325°F (160°C). Line an 8×8-inch square pan with parchment paper, leaving a 1–2 inch overhang on two sides for easy lifting. Lightly spray the parchment with nonstick spray or grease the pan edges.
Step 2 – Make the crust dough
- In a large bowl, whisk together 3/4 cup oat flour, 1 scoop vanilla whey protein (30 g), 2 tbsp sweetener, 1 tsp cinnamon, and a pinch of salt until evenly combined. Add 2 tbsp unsweetened applesauce and 1 tbsp melted light butter. Stir with a fork or rubber spatula until a soft, slightly sticky crumb forms. If the mixture feels too dry to press, add 1 tbsp unsweetened almond milk and mix again.
Step 3 – Press and parbake the crust
- Reserve about one-third of the crust mixture for the crumble topping. Press the remaining two-thirds firmly and evenly into the bottom of the prepared pan (use the bottom of a measuring cup for an even press). Bake the crust in the preheated oven for 8–10 minutes, until lightly fragrant and just set. Remove and let cool 8–10 minutes while you make the cheesecake layer.
Step 4 – Bring the cream cheese to room temperature
- While crust cools, take the light cream cheese out of the fridge if not already softened. Work with room-temperature cream cheese for a lump-free cheesecake. If you are short on time, microwave the block of cream cheese for 10 seconds, then rest 30 seconds and stir to check softness.
Step 5 – Make the cheesecake filling
- In a medium bowl, beat 8 oz softened light cream cheese with a hand mixer or whisk until smooth and free of lumps, about 60–90 seconds. Add 3/4 cup nonfat Greek yogurt, 2–3 tbsp monk fruit sweetener, 1 tsp vanilla, and a pinch of salt. Beat until smooth and silky. Add the 2 egg whites one at a time, mixing briefly after each addition until incorporated. Sift or sprinkle 1 scoop vanilla whey protein (30 g) over the mixture and gently fold in with a rubber spatula until just combined. Do not overmix. The batter should be pourable but thick.
Step 6 – Pour cheesecake over crust
- Pour the cheesecake mixture evenly over the slightly cooled crust and smooth the top with an offset spatula or spoon so it is even.
Step 7 – Prepare the spiced apple layer
- Core and peel the apples. Dice into approx 1/2-inch pieces. In a nonstick skillet over medium heat, combine diced apples, 1 tsp cinnamon, 1 tbsp sugar-free maple syrup, and 1 tsp lemon juice. Cook for 3–4 minutes, stirring occasionally, until apples begin to soften but still hold shape and juices thicken slightly. Remove from heat and let cool 1–2 minutes. If there is excess liquid, drain apples using a slotted spoon so you do not add extra moisture to the cheesecake layer.
Step 8 – Add apples to the pan
- Using the slotted spoon, evenly distribute the warm apple pieces over the cheesecake layer. Gently press them into the top so each square will have apple in it.
Step 9 – Make the crumble topping
- In a bowl, combine 1/2 cup rolled oats, 1 scoop vanilla whey protein (30 g), 1 tbsp almond flour, 1 tsp cinnamon, and a pinch of salt. Add 1 tbsp applesauce, 1 tbsp sugar-free maple syrup, and 1 tbsp melted light butter. Mix until you have coarse, clumpy crumbs. Sprinkle the reserved crumble evenly across the apples, pressing lightly so it adheres but remains rustic.
Step 10 – Bake the assembled bars
- Place the pan in the preheated oven and bake for 35–40 minutes, until the edges look set and the center has a slight jiggle when you gently shake the pan. The top should be lightly golden. Avoid overbaking; the center will firm as it cools.
Step 11 – Cool then chill fully
- Remove the pan from the oven and let cool completely on a wire rack for 30–45 minutes. Then cover loosely with plastic wrap and transfer to the refrigerator for at least 4 hours or overnight. Chilling is essential for the cheesecake layer to set and for clean slices.
Step 12 – Slice and serve
- Use the parchment overhang to lift the set slab from the pan. Place on a cutting board. For clean slices, run a sharp knife under hot water, dry it, then make each cut, wiping the blade between cuts. Slice into 12 bars. Serve cold or slightly chilled. To warm, microwave a bar for 10–15 seconds.
Step 13 – Extra finish and serving suggestions
- Optional: top with a spoonful of Greek yogurt, a dusting of cinnamon, or a drizzle of sugar-free maple syrup. Serve with coffee or as a post-workout treat.
Notes
- Prevent lumps in cheesecake: Use room temperature cream cheese and beat it long enough to be smooth before adding other ingredients. If lumps persist, press the mixture through a fine mesh strainer or beat a bit longer.
- Avoid chalky protein flavour: Fold protein powder in gently and do not exceed the indicated amount. Using vanilla whey reduces chalky taste.
- Watch moisture from apples: Cook apples briefly and use a slotted spoon to remove them from skillet; excess liquid will make the cheesecake too soft.
- Do not overbake: The center should still jiggle slightly; it sets while chilling. Overbaking makes a dry, crumbly texture.
- Easy clean cuts: Chill fully, use the hot-water knife trick, and wipe between slices.
- Make ahead: Bake, chill, and refrigerate for up to 5 days; freeze individual bars for up to 2 months.
Substitutions & Variations
- Dairy-free: Use vegan cream cheese and plant-based yogurt. Texture will be slightly softer.
- Vegan protein: Use a pea or blended plant vanilla protein and add 1-2 tbsp extra almond milk if the batter looks thick.
- Lower carb: Swap apples for 1 cup berries and reduce sweetener. Macros will change.
- Nut-free: Omit almond flour from crumble and use an extra 2 tbsp oats instead.