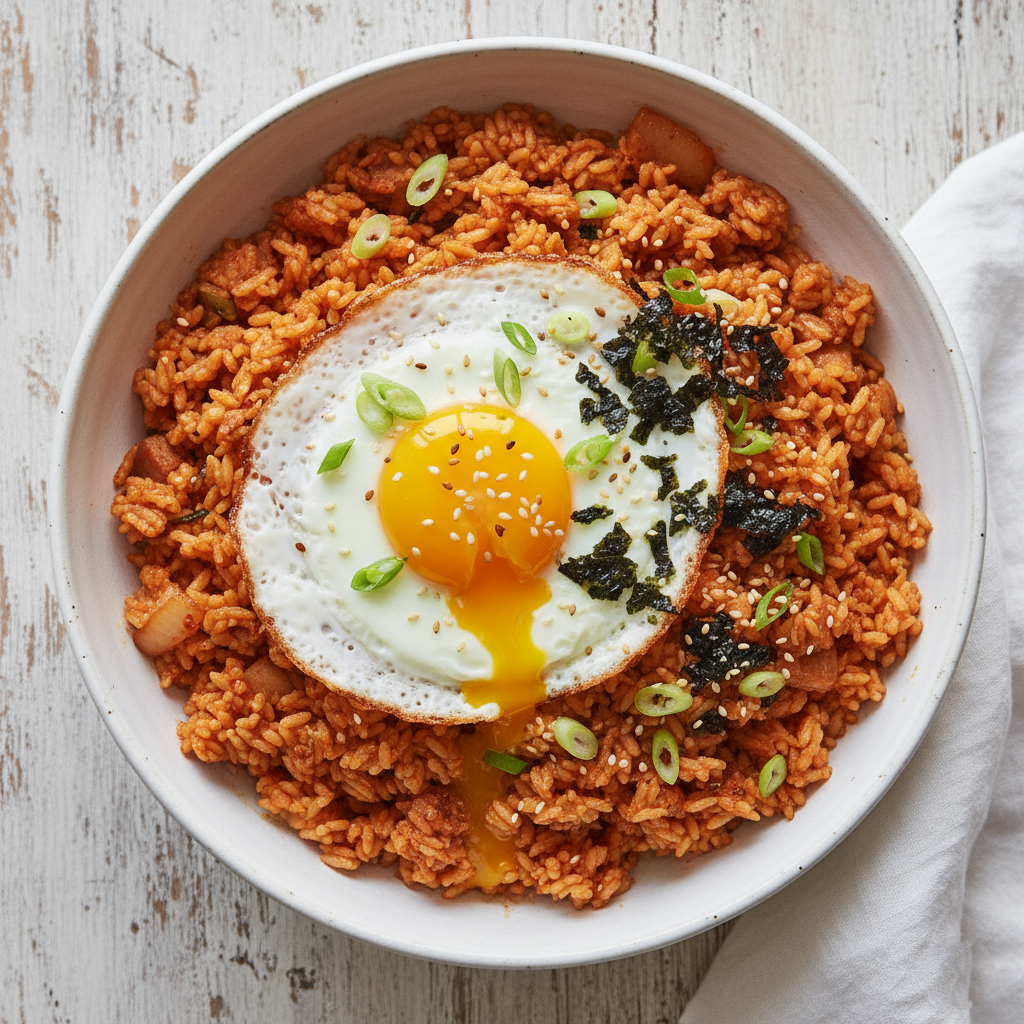
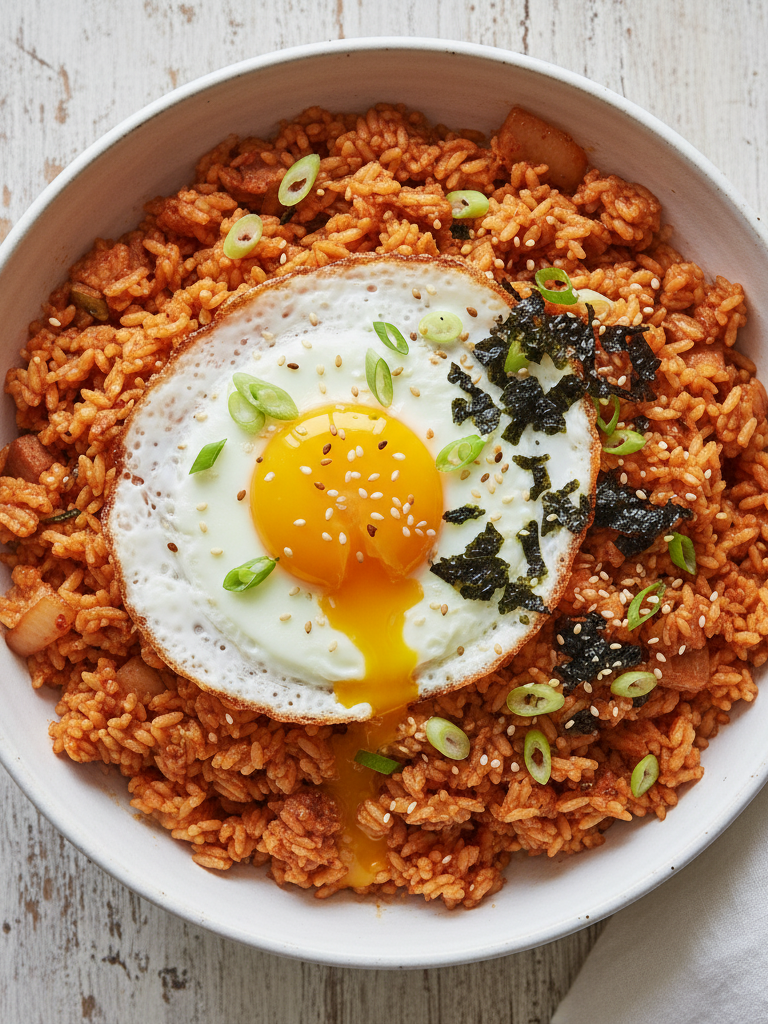
If there’s one dish that defines Korean comfort food, it’s Kimchi Fried Rice, or Kimchi Bokkeumbap (김치 볶음밥). It’s the perfect marriage of flavors: the deep, spicy kick of gochujang, the savory crunch of protein, and the signature tangy pucker of fermented kimchi. But what truly elevates it is the texture that irresistible combination of fluffy, chewy rice grains interspersed with crispy, fried bits. Forget soggy, lackluster results; this recipe delivers authentic, high-heat perfection in less than 30 minutes.
Korean cuisine has undeniably taken the world by storm, and while dishes like Korean BBQ and Tteokbokki dominate the spotlight, Kimchi Fried Rice remains the ultimate weeknight hero.
This recipe is our homage to that classic, designed to be quick, deeply flavorful, and surprisingly easy. We’re not just tossing ingredients together; we’re teaching you the techniques like using only cold, day-old rice and mastering the high-heat sauté that ensure you get that authentic, restaurant-quality result every time.
Whether you’re looking for a satisfying 25-minute dinner, a hearty office lunch, or a scalable meal prep option for the week, this bowl ticks every box. It’s warm, spicy, and packed with savory umami flavor. Get ready to transform your leftovers into the most exciting meal of the week. Let’s dive into the anatomy of what makes this the ultimate Kimchi Fried Rice Bowl!
The Anatomy of a Perfect Bowl
The secret to truly great Kimchi Fried Rice isn’t a complex list of ingredients, but rather understanding the role of the four key components and how they interact in the heat of the pan.
1. The Foundation: Cold, Day-Old Rice
This is the most critical element. Freshly cooked rice holds too much moisture, which turns your dish into a mushy, steaming mess. Cold, day-old rice ensures the grains are dry and separated. This allows them to fry properly when they hit the hot pan, creating those beautiful, chewy, slightly crispy grains a sign of quality Kimchi Bokkeumbap. Using short or medium-grain rice is preferred for optimal texture
2. The Heart: Well-Fermented Kimchi
The flavor profile hinges entirely on using sour, well-fermented kimchi. If your kimchi is brand new and not very sour, the dish will taste flat. The older, tangy brine is where all the deep flavor comes from, and its acidity (balanced later with sugar) is what gives the dish its complexity. Kimchi is also a fantastic source of probiotics, making this dish a surprisingly gut-healthy meal!
3. The Boost: Savory Protein & Aromatics
While diced Spam or crispy bacon is the traditional, hyper-savory choice, this component adds customizable umami flavor. For a lighter touch, you can use thinly sliced pork belly, diced chicken, or even firm tofu. Pairing this protein with sautéed garlic and onion builds the aromatic base that everything else rests upon.
4. The Finish: Butter, Sesame Oil & Egg
These ingredients are added right at the end to elevate the final flavor:
- Butter: A small pat stirred in off the heat adds immediate richness and silkiness to the sauce coating.
- Toasted Sesame Oil: This provides the essential, nutty Korean aroma. Never cook with it; always stir it in at the very end.
- Fried Egg: A sunny-side-up egg with a runny yolk acts as a creamy, decadent sauce when mixed into the hot rice.
The Secret Sauce: Mastering the Kimchi-Gochujang Blend
Achieving the perfect balance spicy, sour, savory, and slightly sweet is the key to making this ultimate recipe. We don’t just dump in ingredients; we create a specialized ‘Sauce Boost’ beforehand.
The Secret Sauce is a mixture of reserved kimchi juice, gochujang (Korean chili paste), soy sauce, and sugar.
- Kimchi Juice: This ensures maximum tangy flavor and vibrant red color without making the overall dish soggy (since we drain the kimchi first).
- Gochujang: This thick, fermented paste provides the primary spicy depth and slight sweetness. Tip: Adjust the amount of gochujang (1 to 2 teaspoons) based on your preferred heat level.
- Sugar: Don’t skip this! It directly counteracts the sourness of the fermented kimchi and the sharpness of the chili paste, creating a rounded, balanced flavor profile that is utterly addictive.
By creating and reserving this blend, you ensure that as soon as the sauce hits the hot rice, it coats every grain evenly, delivering a concentrated burst of flavor without cooling down the pan. This technique is essential for achieving the perfect, balanced Korean taste.
The Frying Revolution: Tips for Crispy, Non-Soggy Rice
The most common complaint when making homemade fried rice is that it turns out gluey or soggy. This is the section dedicated to fixing that! Achieving truly crispy, separated rice grains is a process we call the “Frying Revolution.”
1. The Ultimate Prep: Pat Dry
Even if your rice is day-old, give it a quick check. If it looks damp or clumpy, break it apart with your hands and, ideally, dry-fry it in the pan for 30 seconds before adding the oil. Any excess moisture turns the dish into steam, not stir-fry.
2. High Heat is Your Friend
You need to generate enough heat to cook the ingredients without steaming them. Use a medium-high to high heat setting. Never overcrowd the pan; this drops the temperature instantly and forces the rice to steam itself. Work in batches if necessary, though this recipe is scaled for two servings, which should fit easily in a standard 12-inch skillet.
3. Pan Choice Matters
A cast iron skillet or a large, carbon steel wok is highly recommended. These materials retain heat incredibly well, allowing the rice to develop a crust when pressed against the surface.
4. The “Press and Toss” Technique
When the rice is in the pan, don’t just stir. Use your spatula to press the rice down onto the hot surface for a few seconds. Then, toss it quickly. Repeat this action press, then toss. This encourages the starch to brown and caramelize, giving you those coveted crispy pockets of flavor.
5. Adding the Sauce Last
Notice the sauce blend (Section III) is added after the rice has already been frying for a minute or two. This ensures the rice has a chance to crisp up before you introduce any liquid back into the pan, which would immediately drop the temperature and halt the frying process.
Make sure your kitchen is ready for high heat! We love using this Lodge 12 Inch Cast Iron Skillet for the best crispy results.
Meal Prep Mastery & Serving Suggestions
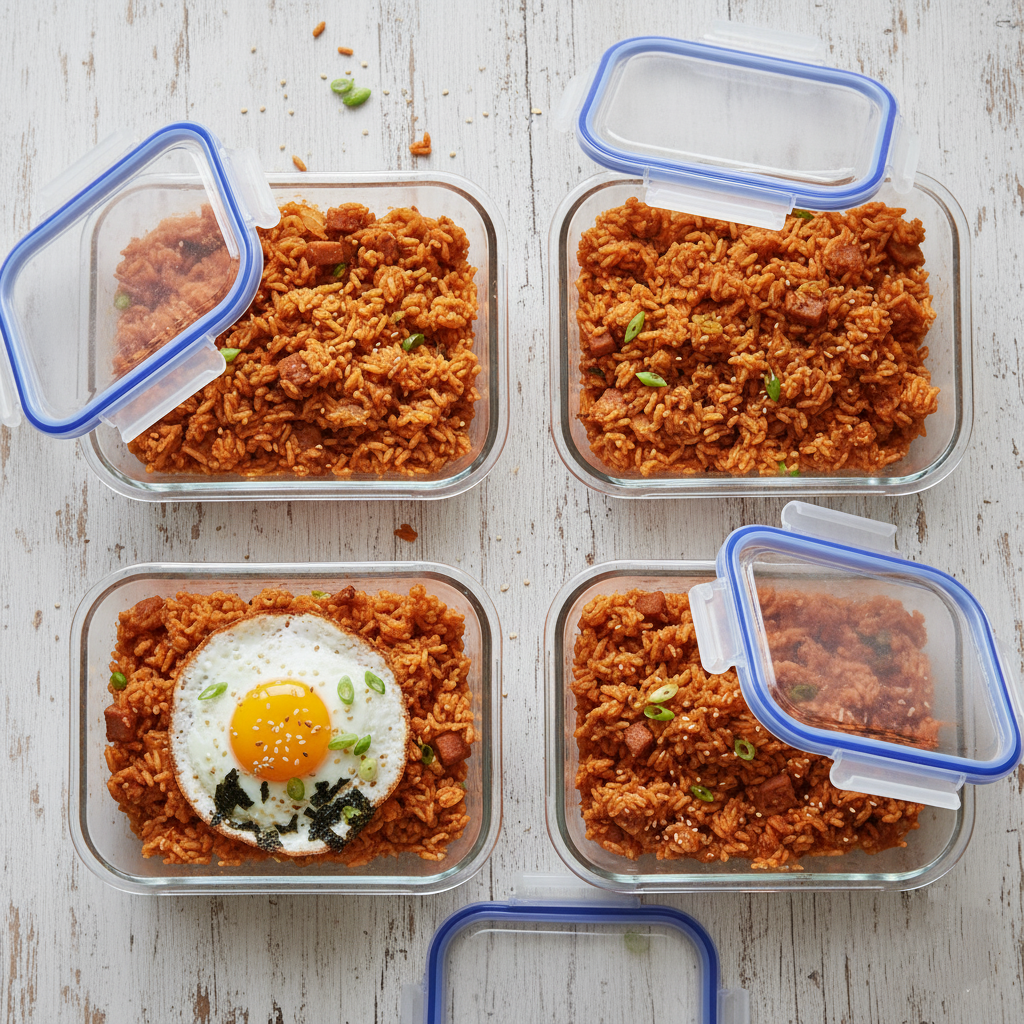
This Kimchi Fried Rice Bowl is not only a fantastic weeknight dinner but also an absolute champion for meal prep hence the beautiful containers we prepared!
How to Meal Prep for 4-5 Days:
The key to successful storage is component separation for maximum flavor and texture retention.
1. Store the Rice Base: Cook the full recipe and portion the fried rice base (rice, kimchi, protein) directly into your glass meal prep containers. Seal them tight.
2. Separate the Toppings: Do NOT put the finished egg, crushed seaweed, or fresh scallions in the containers. Store the scallions and seaweed in a small baggie in the fridge.
3. The Egg Strategy: Fry the eggs fresh right before serving for the best runny yolk texture. If time is tight, you can soft-boil a batch of eggs, peel them, and store them separately.
Serving & Variation Suggestions:
- Quick & Easy: Serve immediately, topped with the fried egg, seaweed, and a sprinkle of Toasted Sesame Oil.
- The Cheese Pull: For a richer, American-Korean fusion experience, add a handful of shredded mozzarella or sharp cheddar during the last 30 seconds of frying.
- Add Fresh Greens: Stir in a handful of chopped spinach or kale at the very end for a quick vegetable boost.
- Make it Vegetarian: Use firm tofu (diced and pan-fried until crispy) instead of Spam, and ensure you purchase a vegetarian-friendly kimchi (many contain fish sauce, so double-check the label!).
Frequently Asked Questions (FAQ)
We anticipate a few questions when diving into the world of Korean cooking. Here are the answers to the most common queries about the Kimchi Fried Rice Bowl:
Conclusion & Call to Action
You are now officially a master of Kimchi Bokkeumbap!
By understanding the importance of the four components and implementing the Frying Revolution techniques, you can confidently create a dish that rivals your favorite Korean restaurant. This recipe is a testament to how quick, minimal effort can result in maximum flavor and satisfaction. It’s the perfect spicy, savory solution for dinner tonight.
We can’t wait to hear how this recipe turned out for you! If you love this ultimate bowl, please leave a star rating and a comment below your feedback helps us bring more authentic and delicious recipes to the abbyshealthseries.com community.
Pin this recipe to your Korean Comfort Food board right now!