Tastes like a taco, 40g protein, no shell.” That is the promise of this viral Cottage Cheese Taco Bowl. If you are trying to hit your protein goals but are tired of dry chicken and protein shakes, this is the disruption your diet needs.
By replacing the traditional rice or tortilla base with whipped, seasoned cottage cheese, we aren’t just cutting carbs we are doubling the protein efficiency of the meal. But there is a catch: if you use the wrong cottage cheese or skip the “textural engineering” step, you end up with a watery, clumpy mess. This guide explains the specific chemistry of whipping cottage cheese to create a “sour cream” consistency and how to layer your bowl so it doesn’t turn into soup.
The Science: Why “Whipping” Changes Everything
Why is cottage cheese suddenly trending? It comes down to textural modification. Many people avoid cottage cheese because of the “curds” (lumpy texture). However, when you subject cottage cheese to high-speed mechanical shearing (blending), you break down the curd structure into a smooth emulsion that creates a mouthfeel identical to sour cream or queso.
The Casein Advantage The primary protein in cottage cheese is Casein. Unlike Whey protein (which digests in 30 minutes), Casein is a phosphoprotein that forms a gel in the stomach. This slows down gastric emptying.
- Why this matters: A rice-based taco bowl spikes your glucose and leaves you hungry in 2 hours. This Casein-based bowl releases amino acids into your bloodstream for 4-6 hours, keeping you satiated long after lunch.
The Thermal Threshold (Don’t Break the Emulsion) This is the most critical scientific rule of this recipe: Cottage cheese has low thermal stability. If you heat cottage cheese past 120°F (49°C), the emulsion breaks. The protein tightens and squeezes out the water, leaving you with a gritty, rubbery solid sitting in a pool of hot whey.
This is why we do not bake this bowl. We utilize Thermal Contrast: We keep the whipped base cold (40°F) and the meat hot (160°F). When the hot meat hits the cold base, it softens the fat just enough to create a creamy sauce without breaking the protein bonds.
Ingredient Deep Dive
To achieve the correct viscosity (thickness), specific ingredients are non-negotiable.
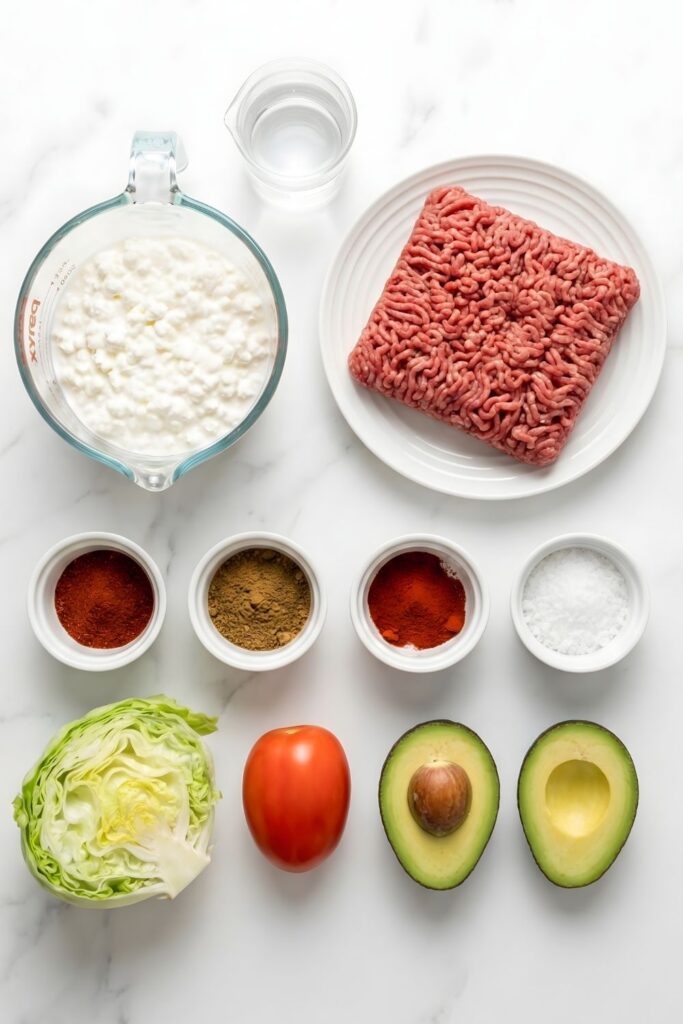
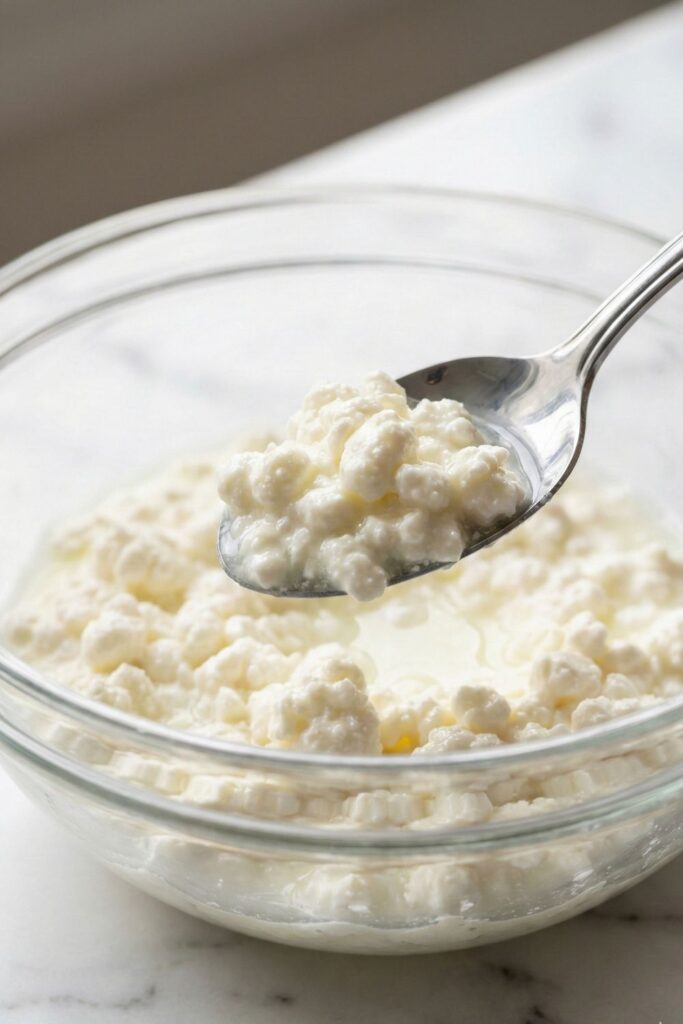
- The Base: 4% Milkfat Small Curd You must use 4% Milkfat (often labeled “Whole Milk”).
- The Chemistry: Fat is a stabilizer. Lower fat versions (0% or 2%) have a higher water content to compensate for the lack of fat. If you whip fat-free cottage cheese, the cellular structure collapses into a runny soup because there are not enough fat globules to hold air. The 4% fat provides the structure needed to hold up the heavy meat topping.
- Brand Recommendation: I recommend Good Culture or Daisy because they use live active cultures and fewer gums, which whip into a cleaner, fluffier texture.
- The Seasoning: Why You Should Skip the Packet Most store-bought taco seasoning packets list Cornstarch and Maltodextrin as the first two ingredients.
- The Problem: These are thickeners. When you mix a cornstarch-heavy powder with the moisture of cottage cheese, it can create a “gummy” or “pasty” texture that coats the roof of your mouth.
- The Fix: We use a pure spice blend (Chili Powder, Cumin, Smoked Paprika). This flavors the fat without altering the viscosity.
- The Crunch Factor (Textural Interrupt) Since we removed the taco shell, we removed the “crunch.” Eating a bowl of entirely soft food (soft cheese, soft meat, soft avocado) leads to “palate fatigue.”
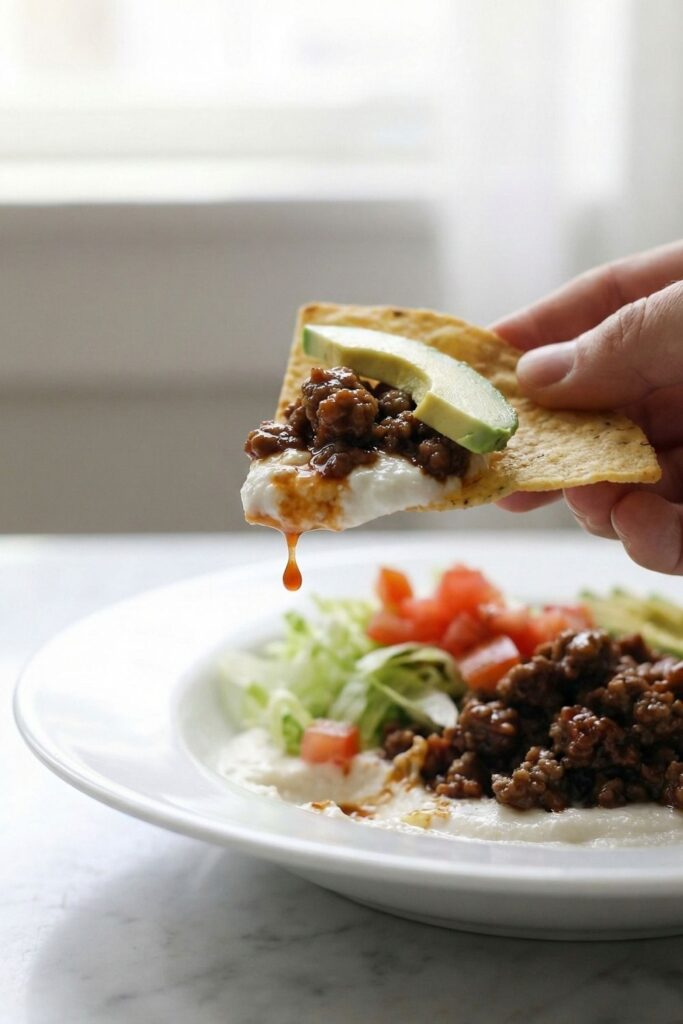
- The Solution: You must re-introduce a rigid texture. I recommend High-Fiber Tortilla Strips or crushed Quest Protein Chips. This “snap” provides the auditory signal to your brain that you are eating a taco, satisfying the craving completely.
Equipment Clinic
You cannot achieve the viral “creamy” texture with a spoon, and you likely won’t get it with a standard blender. You need the right tool for the physics of the job.
- The Food Processor (The Gold Standard) A food processor uses a wide blade that spins near the bottom of a wide bowl. This creates Shear Force. It grabs the heavy curds and throws them against the wall of the bowl, aerating them in the process. This introduces microscopic air bubbles, giving the final product a “whipped mousse” texture.
- Why Not a Standard Blender? Standard blenders rely on Cavitation and gravity. They need liquid to create a vortex. Since we are not adding liquid (no milk, no water), a standard blender will simply spin its blades in an air pocket while the cheese sits stuck to the sides. If you add water to get it moving, you ruin the recipe by making it runny.
Stick to the Food Processor.
Step-by-Step Guide
Step 1: The Mise en Place & Tempering
Begin by taking your ground beef out of the refrigerator 15 minutes before cooking. Cold meat hits the hot pan and lowers the temperature immediately, causing the meat to “steam” in its own juices rather than brown. We want browning. Meanwhile, keep the cottage cheese strictly cold. Do not let it sit out; we need the fat to remain solid until the moment of consumption.
Step 2: The Mechanical Whip
Place 1 cup of 4% cottage cheese into your food processor. Pulse on High.
- Sensory Cue (Sight): At 15 seconds, it will look like “wet popcorn.” This is not ready.
- Sensory Cue (Sound): The sound will change from a loud “rattle” (solid curds hitting the wall) to a smooth, lower-pitch “hum.” This indicates the mixture has emulsified.
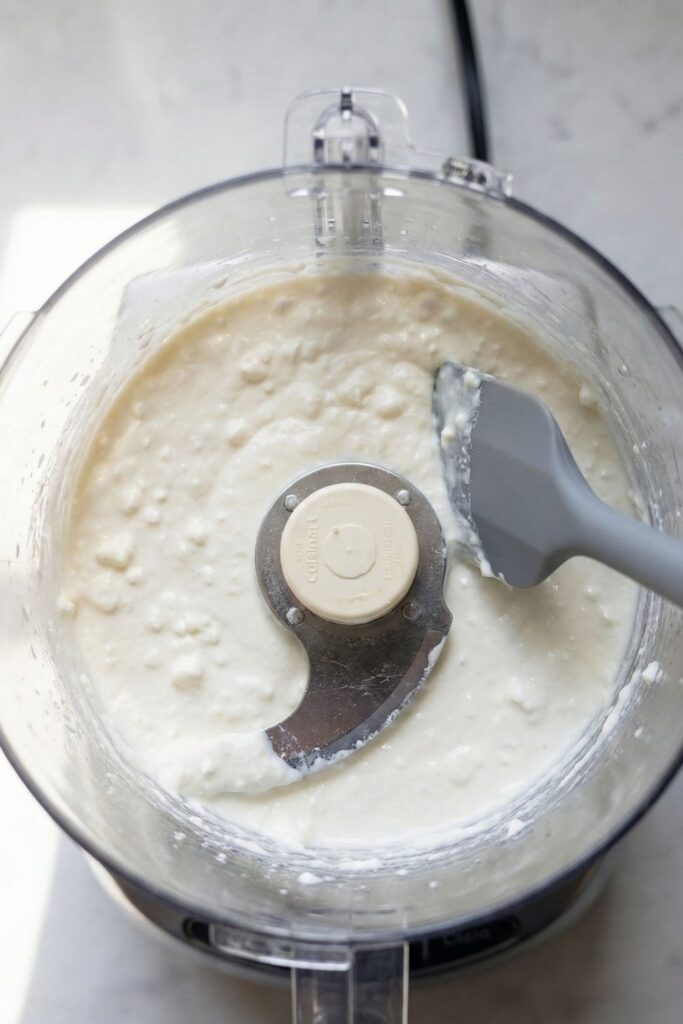
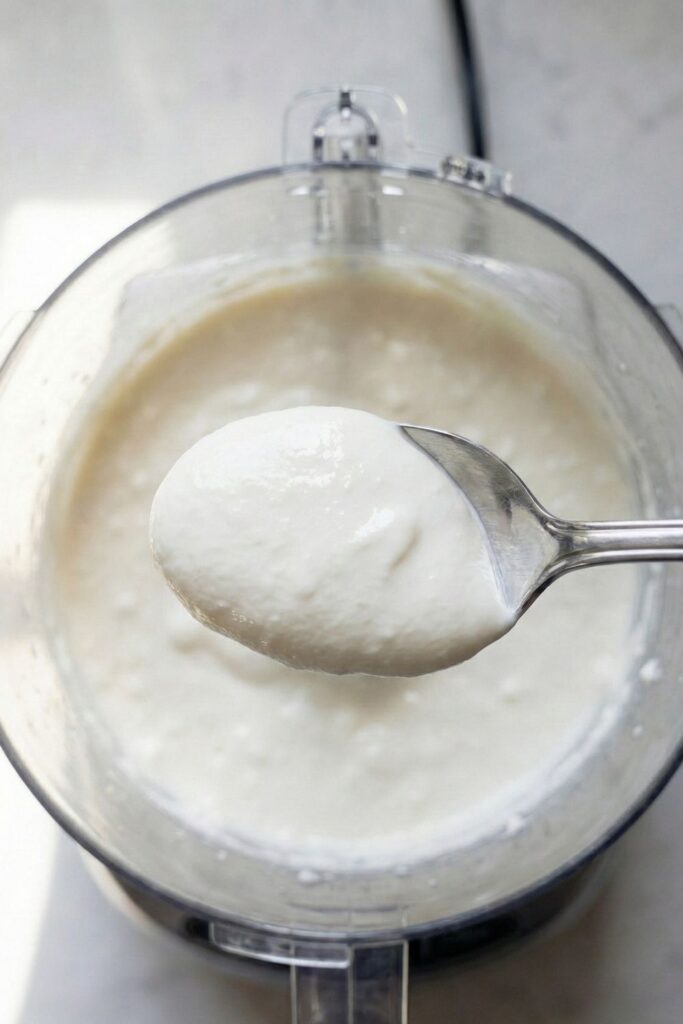
- The Check: Stop at 60 seconds. Dip a spoon in. It should cling to the spoon upside down. If it drips, it’s too thin (or you used low-fat cheese). If it’s grainy, blend for another 30 seconds.
Step 3: The Maillard Reaction
Heat your skillet to medium-high. Add the beef. Do not touch it. Let it sit undisturbed for at least 2 minutes. We are looking for the Maillard Reaction the chemical browning of amino acids that creates savory flavor. Once browned, break it up. Add your spices (Chili Powder, Cumin, Paprika) and crucially 2 tablespoons of water.
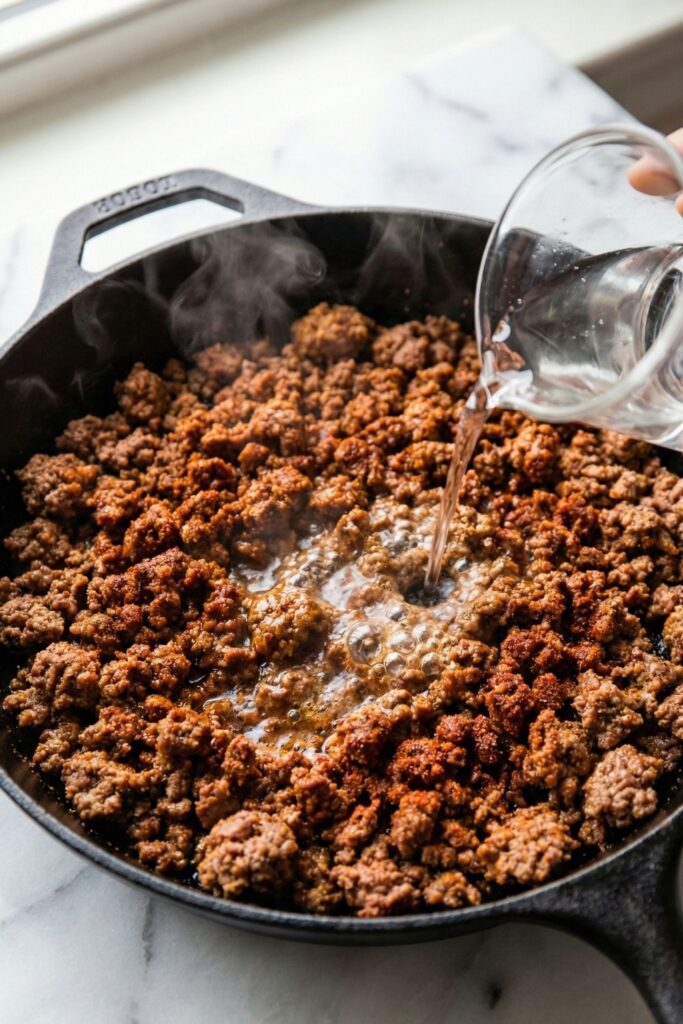
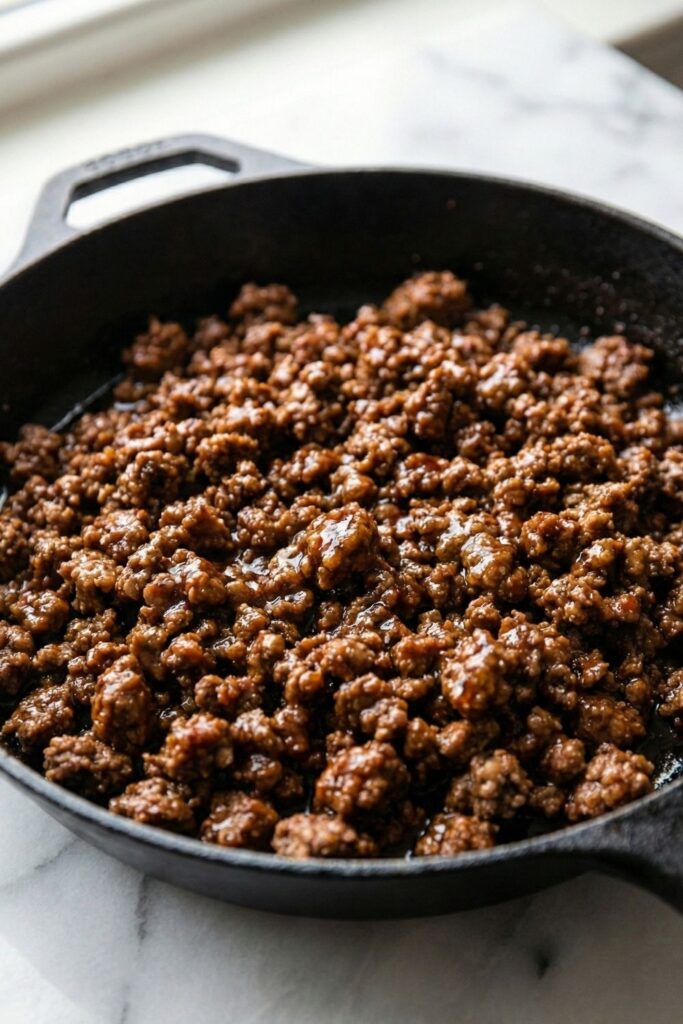
- Why the water? Spices are oil-soluble but can burn easily. The water “blooms” the spices, hydrating them and creating a glossy sauce that coats every crumble of beef.
Step 4: Engineering the “Cool Base”
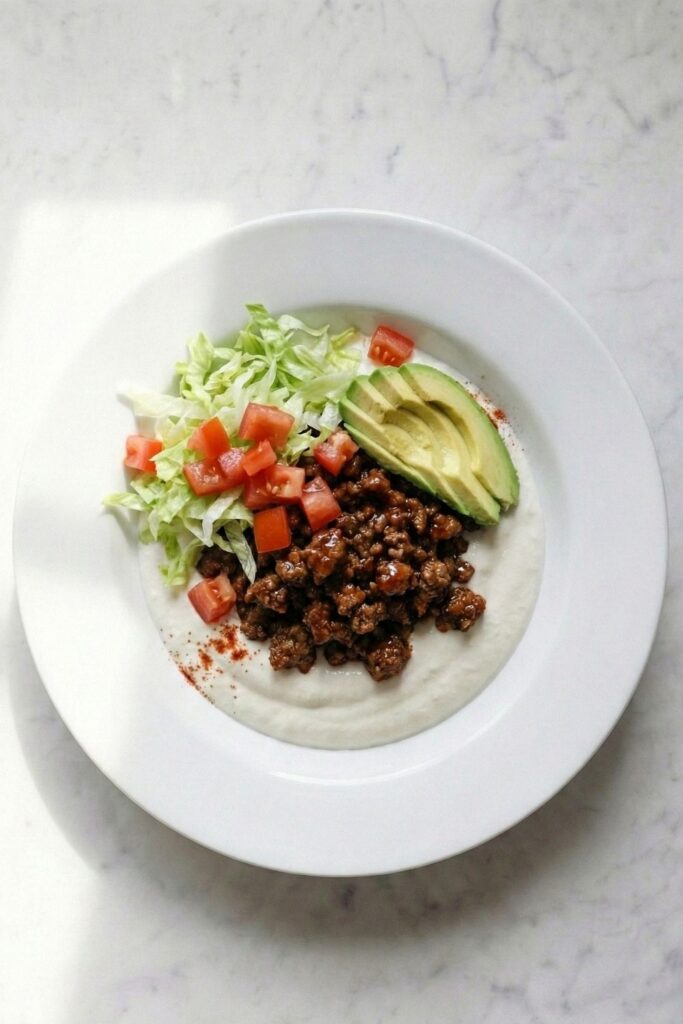
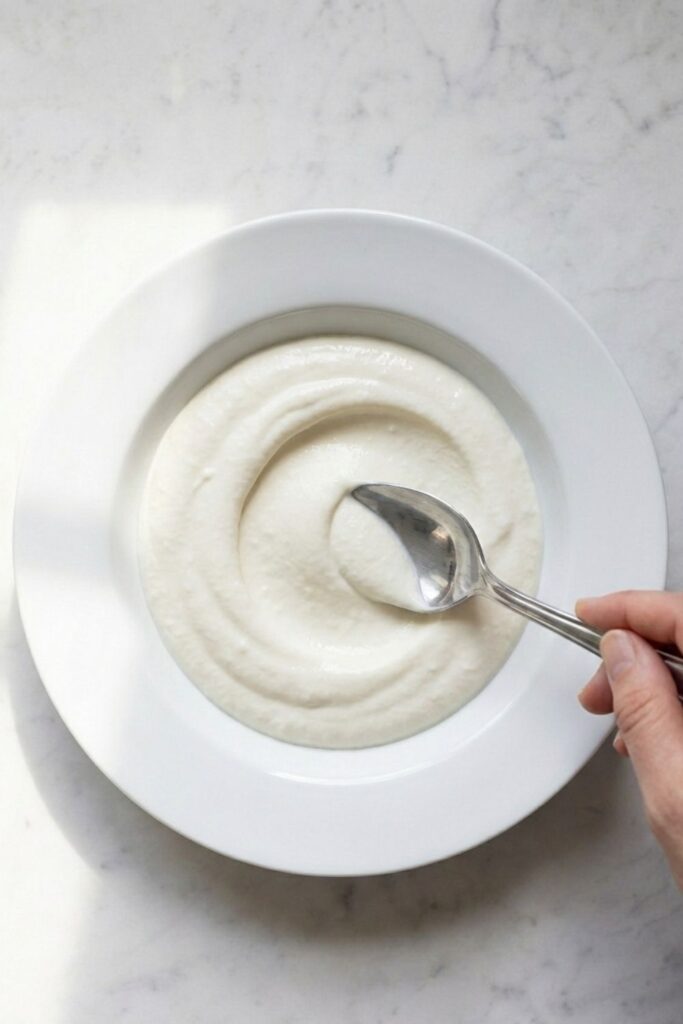
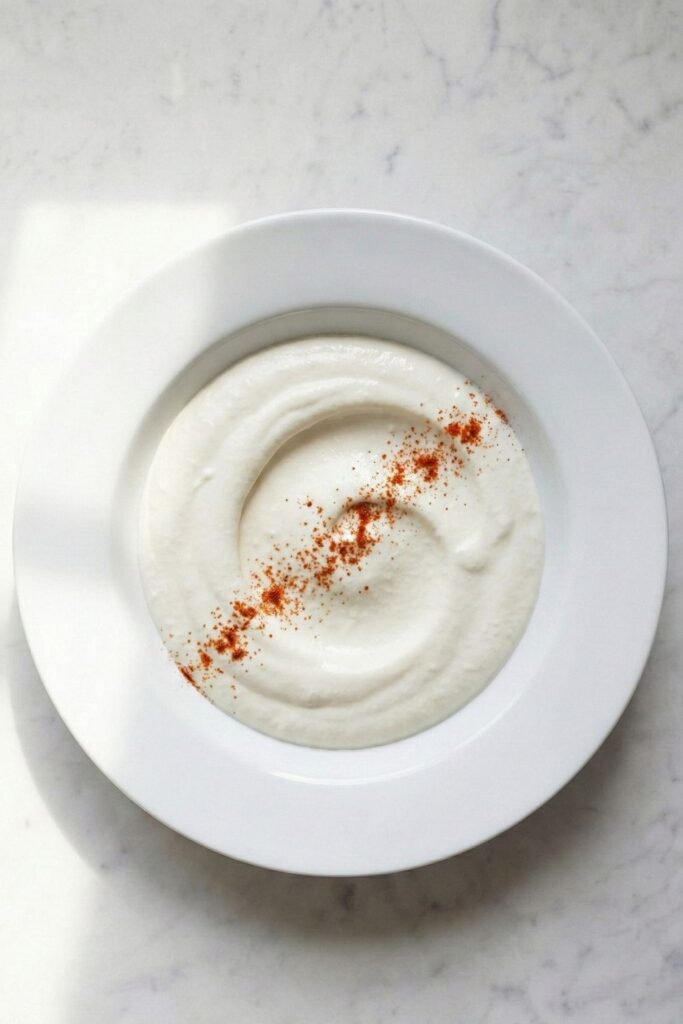
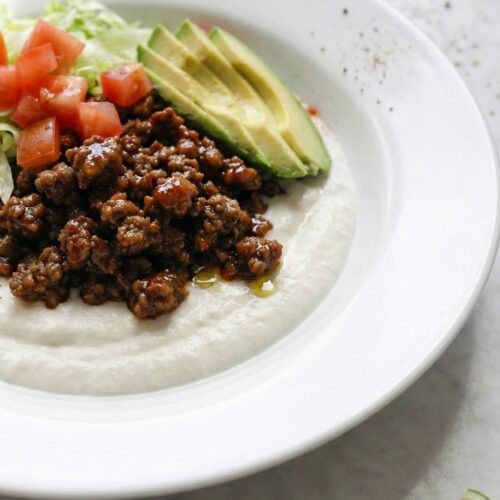
Spoon the whipped cheese into a shallow wide bowl. Use the back of a spoon to create a “crater” or deep well in the center.
- The Physics: This crater is structural. It holds the juices from the meat. If you use a flat plate, the hot grease will run off the cheese and separate. The crater keeps the thermal layers distinct.
Step 5: Thermal Assembly
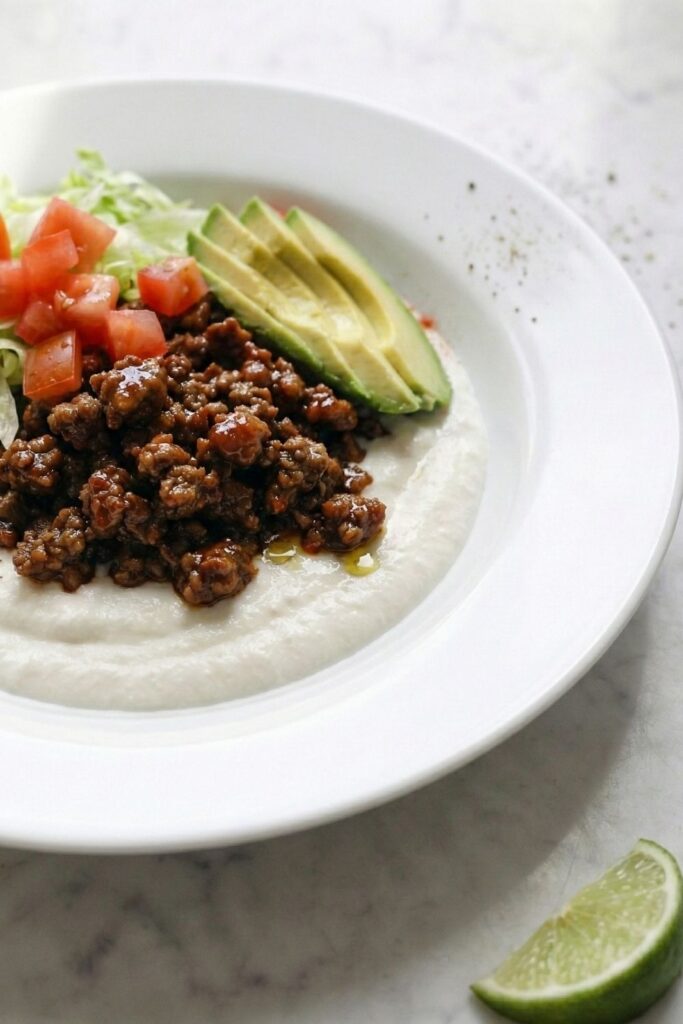
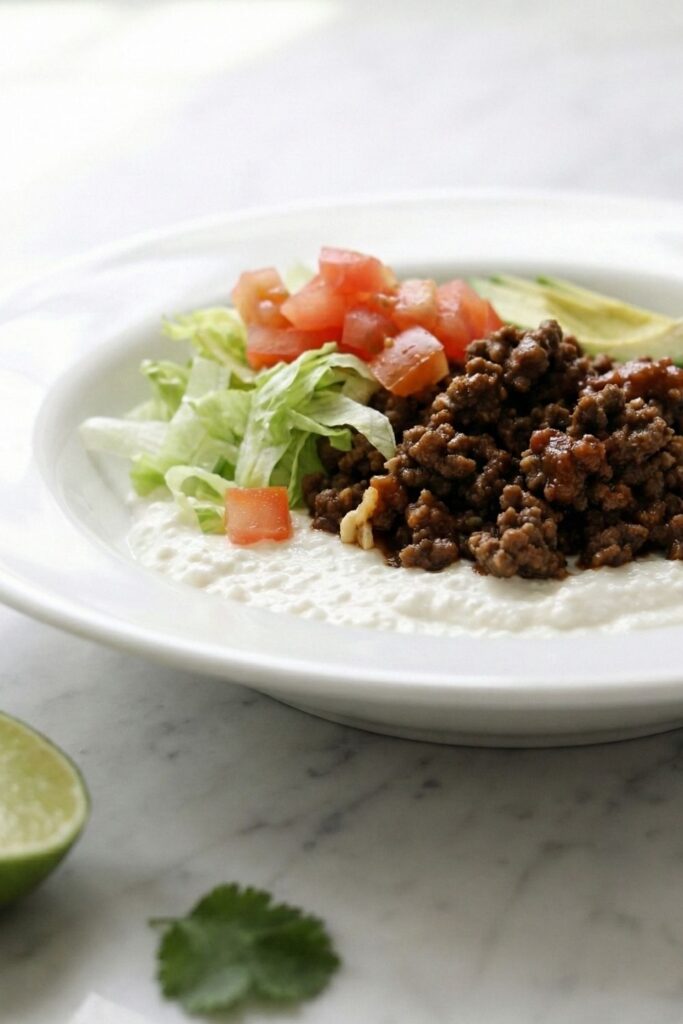
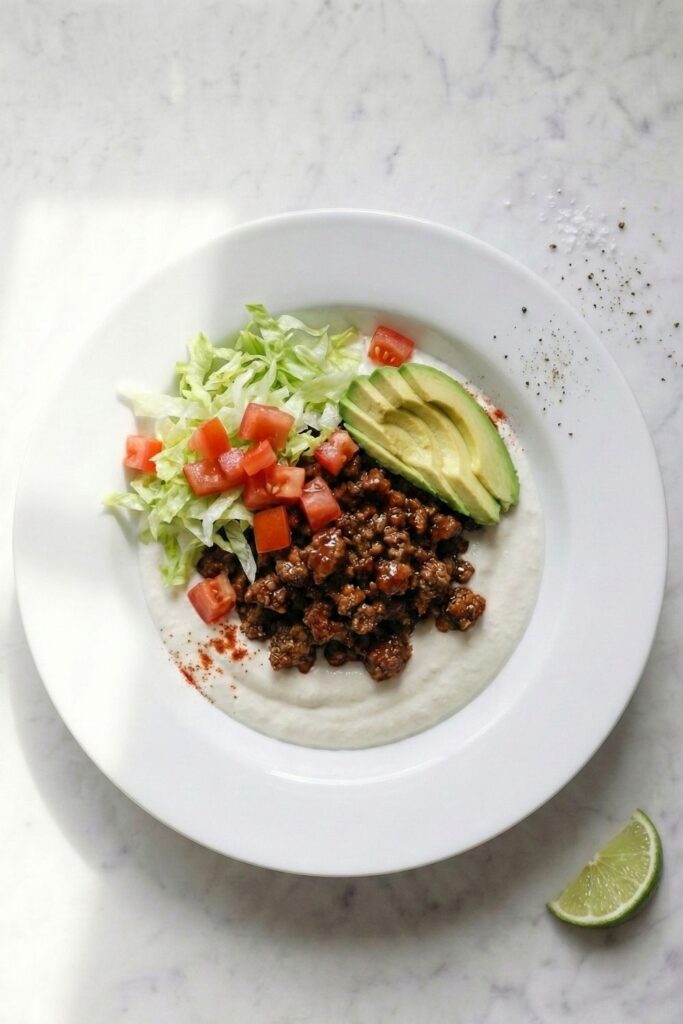
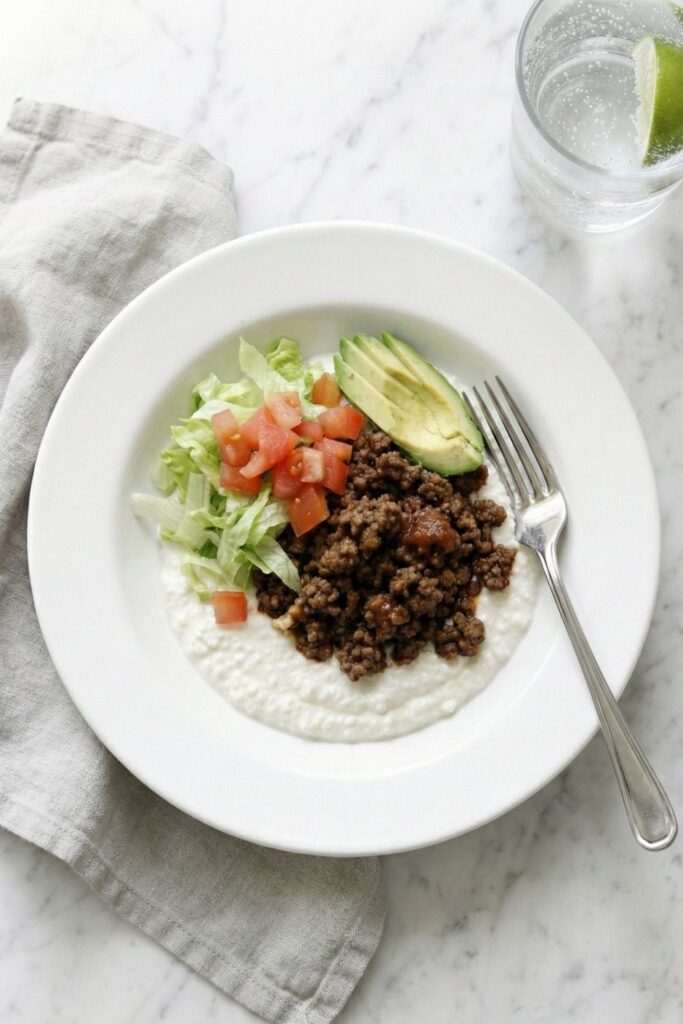
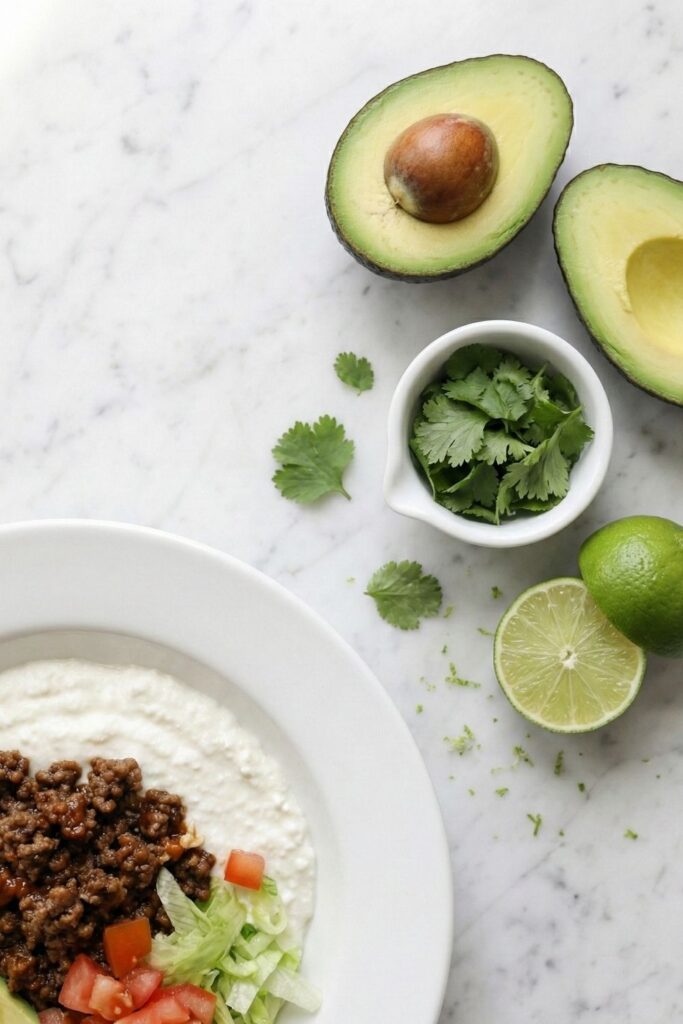
Immediately spoon the piping hot meat into the center of the cool cheese well. Top with shredded lettuce, diced tomatoes, and avocado. Finally, add your “crunch factor” (tortilla strips) last to prevent them from getting soggy.
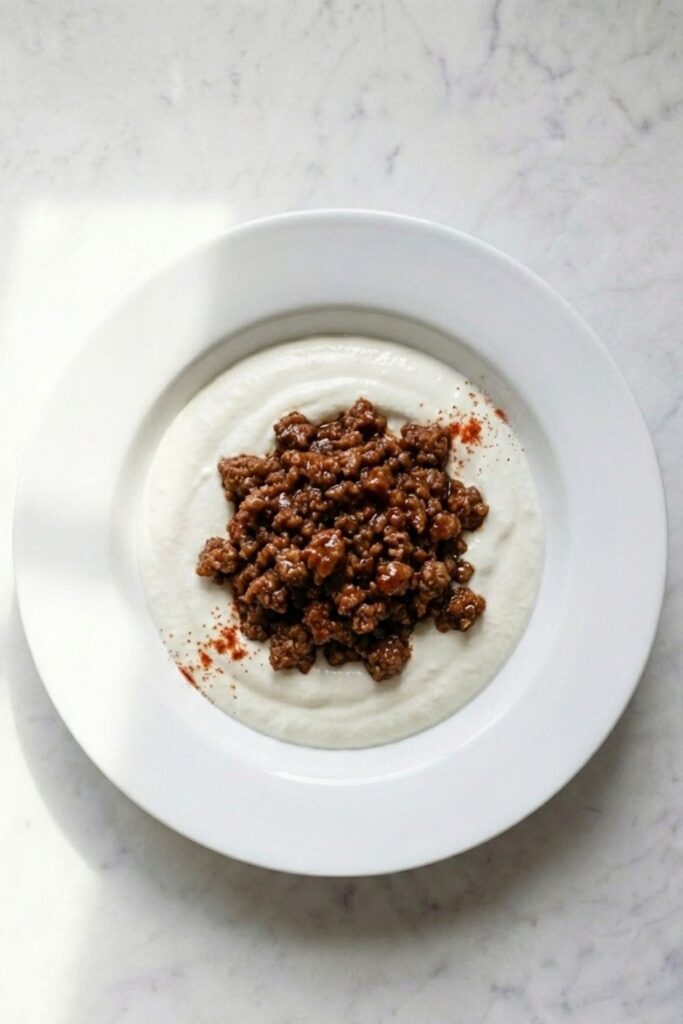
- The Experience: Eat immediately. The magic happens in the contrast between the hot, savory meat and the cold, tangy cream base.
Troubleshooting Guide
Even with a simple recipe, things can go wrong. Here is the chemistry of why your bowl might fail.
“My bowl turned into soup.”
- The Cause: You likely added high-water vegetables without draining them. Tomatoes and salsa are 95% water. When they sit on top of the salt in the taco meat, Osmosis draws that water out, flooding your bowl.
- The Fix: Always use a slotted spoon for salsa. If using fresh tomatoes, dice them and pat them dry with a paper towel before adding. Also, ensure you used 4% milkfat cheese.
“The texture is gritty.”
- The Cause: Undermixing. Cottage cheese curds are resilient.
- The Fix: You need to be aggressive. 60 seconds is the minimum. If you are using an older food processor with dull blades, it may take up to 2 minutes. Do not be afraid of “over-whipping” it is very difficult to break the emulsion of cold cottage cheese just by blending.
“It tastes too ‘tangy’.”
- The Cause: Cottage cheese is naturally acidic (lactic acid).
- The Fix: If the tang is too sharp for you, add 1/4 teaspoon of Taco Seasoning directly into the cottage cheese while whipping. This neutralizes the acidity with savory notes, masking the “dairy” flavor profile.
Serving & Storage
Meal Prep Strategy This recipe is an excellent candidate for meal prep, but you must respect the separation of states.
- Storage: Store the whipped cottage cheese in one airtight container and the cooked taco meat in a separate container.
- Reheating: Never microwave the cottage cheese. Microwave the meat separately until hot (165°F).
- Assembly: Assemble the bowl fresh. If you store the meat on top of the cheese in the fridge, the fat from the meat will seep into the cheese, creating an oily layer that is unpalatable the next day.
The Success Station (FAQs)
Technically, yes. However, Greek Yogurt has a much sharper, more sour flavor profile due to the straining process. Cottage cheese is milder and saltier, which mimics the flavor profile of cheese/sour cream much better in a savory taco application.
Yes. By eliminating the tortilla (25g carbs) and rice (45g carbs), you reduce the net carbs to approximately 6-8g per bowl (coming primarily from the lactose in the dairy and the vegetables). It is a high-satiety, ketogenic powerhouse.
No. Freezing cottage cheese causes the water to crystallize and expand, rupturing the protein structure. When you thaw it, it will separate into chunks of curd and yellow liquid whey. It is impossible to fix this texture. Always whip fresh.
Viral Cottage Cheese Taco Bowl (High Protein)
Ingredients
The Whipped Base
- 2 cups Cottage Cheese 4% Milkfat, Small Curd
- 1/4 tsp Smoked Paprika Optional, for color
The Taco Meat
- 1 lb Lean Ground Beef 93% Lean / 7% Fat
- 1 tbsp Chili Powder
- 1 tsp Ground Cumin
- 1 tsp Smoked Paprika
- 1/2 tsp Garlic Powder
- 1/2 tsp Onion Powder
- 1/2 tsp Sea Salt
- 2 tbsp Water Crucial for blooming spices
The Fresh Toppings
- 2 cups Iceberg Lettuce shredded
- 2 Roma Tomatoes diced
- 1 Large Avocado sliced
- 1/4 cup Tortilla Strips High fiber optional or crushed Quest Chips
Instructions
- Temper the Meat Remove the ground beef from the refrigerator 15 minutes prior to cooking. This ensures a proper sear rather than steaming.
- Whip the Base (The “Hack”) Place the cottage cheese into a food processor. Pulse on high for 60 seconds. Stop halfway to scrape down the sides. The final texture should be completely smooth, glossy, and resemble thick sour cream. Tip: Do not use a blender; it requires liquid to spin, which will make your bowl runny.
- Brown the Meat Heat a large skillet over medium-high heat. Add the beef and press it into a single layer. Let it cook undisturbed for 2-3 minutes to develop a brown crust (Maillard reaction). Break the meat into crumbles and cook until fully browned (no pink remains).
- Bloom the Spices Lower heat to medium. Add the chili powder, cumin, paprika, garlic powder, onion powder, and salt. Pour in the 2 tablespoons of water. Stir vigorously for 30 seconds. The water will evaporate but leave the meat coated in a glossy, flavorful sauce. Remove from heat.
- Assemble the Bowl Spoon 1/2 cup of the whipped cottage cheese into the bottom of a wide bowl. Use the back of a spoon to create a “well” or swoosh in the center.
- Layer & Serve Spoon the hot taco meat directly into the center of the cool cheese well. Top immediately with shredded lettuce, tomatoes, and avocado slices. Serve immediately to enjoy the hot/cold thermal contrast.
Notes
- Avoid the Watery Mess: Do not use 0% or 2% fat cottage cheese. The lack of fat destabilizes the whip, and it will turn into soup when the hot meat touches it. Stick to 4% Milkfat.
- Storage: Store the whipped cheese and the cooked meat in separate containers. Do not assemble until ready to eat. Reheat the meat separately; never microwave the cottage cheese base (it will separate).
- Spice Hack: If you don’t have individual spices, you can use 1 packet of low-sodium taco seasoning, but add an extra tablespoon of water to prevent the cornstarch in the packet from making the meat “gummy.”
- Protein Count: With 1/2 cup cottage cheese (14g protein) and 4oz lean beef (24g protein), this bowl delivers nearly 40g of complete protein.
Equipment
- Food Processor (Required for the whipped texture.
- Large Skillet (Non-stick or Cast Iron)
- Spatula
Nutrition (Per Serving)
- Calories: 385
- Carbohydrates: 9g
- Protein: 38g
- Fat: 21g
- Fiber: 4g
- Sugar: 4g