The “Deconstructed” Classic Optimized for Satiety and Blood Sugar Control.
Let’s look at the data.
A standard restaurant egg roll is a metabolic disaster. It is deep-fried in inflammatory seed oils. It is also wrapped in refined white flour. And dipped in sugar-laden duck sauce.
The macronutrient profile is predominantly fat and simple carbohydrates. This spikes blood glucose immediately, leading to a subsequent crash and hunger signals returning within 90 minutes.
We are changing that equation today.
This recipe is not just a “stir-fry.” It is a precision-engineered reconstruction of the egg roll flavor profile, stripped of the glycemic load and rebuilt to maximize protein synthesis.
By removing the wrapper and increasing the volume of fibrous cruciferous vegetables, we create a meal that triggers high satiety (fullness) hormones like GLP-1.
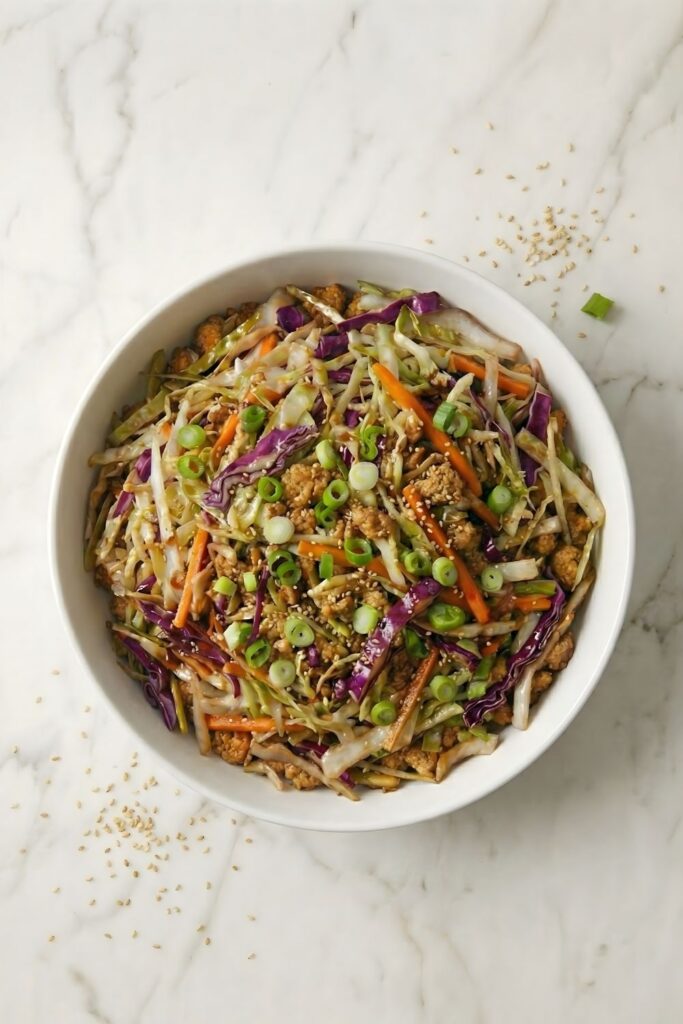
You get the exact sensory experience of takeout the savory umami, the crunch, the toasted sesame finish without the inflammation or the caloric density.
It requires zero specialized equipment. It comes together in under 20 minutes. And chemically, it checks every box for a high-performance meal.
The Science: Why This Formulation Works
The Maillard Reaction vs. Steaming
The success of this dish hinges on one chemical process: the Maillard reaction.
This is the chemical reaction between amino acids and reducing sugars that gives browned food its distinctive flavor. In this recipe, we apply it to the ground meat.
Most home cooks fail here. They crowd the pan.
When you crowd the pan with too much cold meat, the internal temperature of the skillet drops rapidly. Moisture releases from the cells faster than it can evaporate.
The result? You are steaming your meat in its own grey juices. Steamed meat lacks flavor depth.
To achieve the “takeout” taste, we need surface temperatures above 300°F (150°C). This creates a “fond” (browned bits) on the bottom of the pan. This fond is pure flavor concentration, which we will later deglaze with our aromatics.
The Brassica Matrix (Texture Preservation)
Cabbage is the bulk of this recipe. It belongs to the Brassica genus.
These vegetables contain sulfur-rich compounds called glucosinolates.
Here is the technical challenge with brassicas:
When cabbage is overcooked or boiled, these glucosinolates break down thermally into hydrogen sulfide. This is the gas responsible for the unpleasant “rotten egg” smell associated with cafeteria cabbage.
We avoid this by utilizing high-heat, short-duration sautéing.
By keeping the exposure to heat brief and intense, we soften the cellulose structure of the plant cell walls just enough to make it palatable. However, we stop before the sulfur compounds degrade.
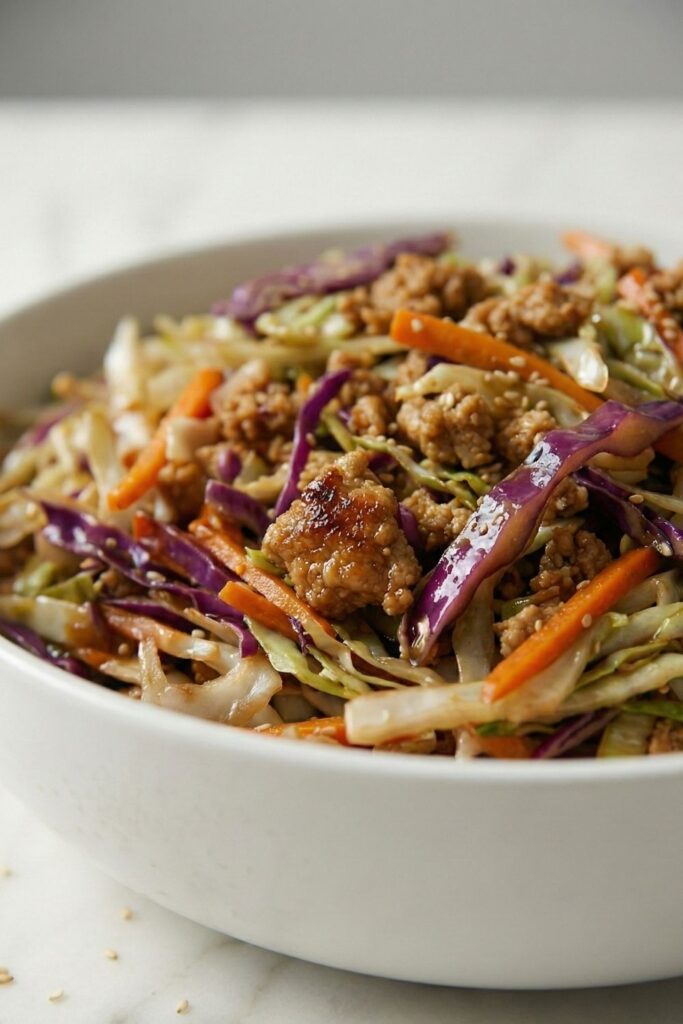
This preserves the “crunch.” It preserves the vibrant color. And most importantly, it keeps the fiber intact.
GLP-1 Optimization
For readers focusing on GLP-1 optimization (whether naturally or supported by medication), the goal is Satiety Per Calorie.
This recipe utilizes two mechanisms for this:
- Protein Density: We aim for 25g+ of protein per serving. Amino acids are the most satiating macronutrient.
- Gastric Distension: The high volume of cabbage mechanically stretches the stomach wall. This signals the vagus nerve to tell the brain “we are full,” even though the calorie count remains low.
Ingredient Deep Dive
- The Protein Substrate
- Recommendation: 93% Lean Ground Turkey or Pork.
- The Chemistry: We choose 93% rather than 99% for a specific reason. Fat is a flavor carrier. Many aromatic compounds in ginger and garlic are fat-soluble, not water-soluble.
- The Utility: You need a small amount of lipid content to transport the flavor across your palate. If you strictly use 99% lean meat, you must add exogenous fat (like avocado oil) to compensate, or the dish will taste flat and metallic.
- The Aromatic Profile (Ginger & Garlic)
- Freshness Protocol: You cannot use powdered ginger here. Powdered ginger lacks zingibain, an enzyme found in fresh ginger that acts as a natural meat tenderizer.
- Quantity: We use a 2:1 ratio of garlic to ginger.
- Processing: Grating is superior to chopping. Grating ruptures more cell walls, releasing the maximum amount of aromatic oils (allicin in garlic) to blend seamlessly into the sauce.
- The Umami Complex (The Sauce)
- Soy Sauce / Tamari: This provides the glutamates. If you are gluten-sensitive, Tamari is the mandatory swap.
- Toasted Sesame Oil: This is a finishing oil, not a cooking oil.Thermal Warning: Toasted sesame oil has a low smoke point (approx 350°F). If you use it to sear the meat, you will burn the delicate nut solids and create a bitter flavor. It is added at the very end.
- Rice Vinegar: This provides acetic acid. This acid cuts through the richness of the pork/turkey fat and brightens the earthiness of the cabbage.
- The “Crunch” Factor
- Green Onions (Scallions): We separate the whites from the greens. The whites are cooked (to mellow the onion flavor); the greens are used raw (for texture).
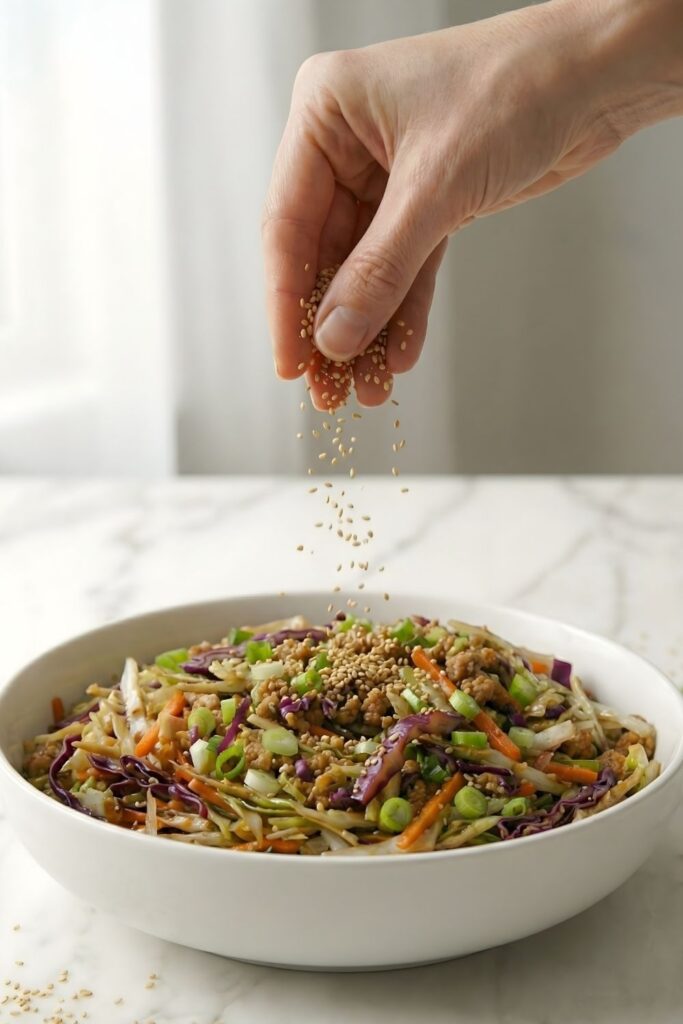
- Sesame Seeds: Provides texture contrast.
Equipment Clinic
The Vessel: 12-Inch Stainless Steel or Cast Iron Skillet
The choice of pan dictates the texture of the cabbage.
Why not a small pot? Geometry matters. You need a wide surface area to maximize evaporation.
If you put this volume of cabbage into a deep, narrow pot, the water released by the vegetables will pool at the bottom. The cabbage on top will be steamed by the cabbage on the bottom.
You want a large, 12-inch skillet (or a wok) to ensure that moisture evaporates instantly upon hitting the hot metal. This ensures a fry, not a stew.
The Prep Tools
- Microplane: As mentioned, for the aromatics.
- Tongs: Tongs are superior to a spatula for this recipe. A spatula compresses the cabbage mixture, trapping steam. Tongs allow you to “lift and drop” the mixture, aerating it and ensuring even heat distribution without crushing the cell walls.
Visual Step-by-Step with Sensory Details
Reading this step by step guide gives you an understanding of every texture needed but if you want the full recipe ingredients then you can definitely
Jump to Recipe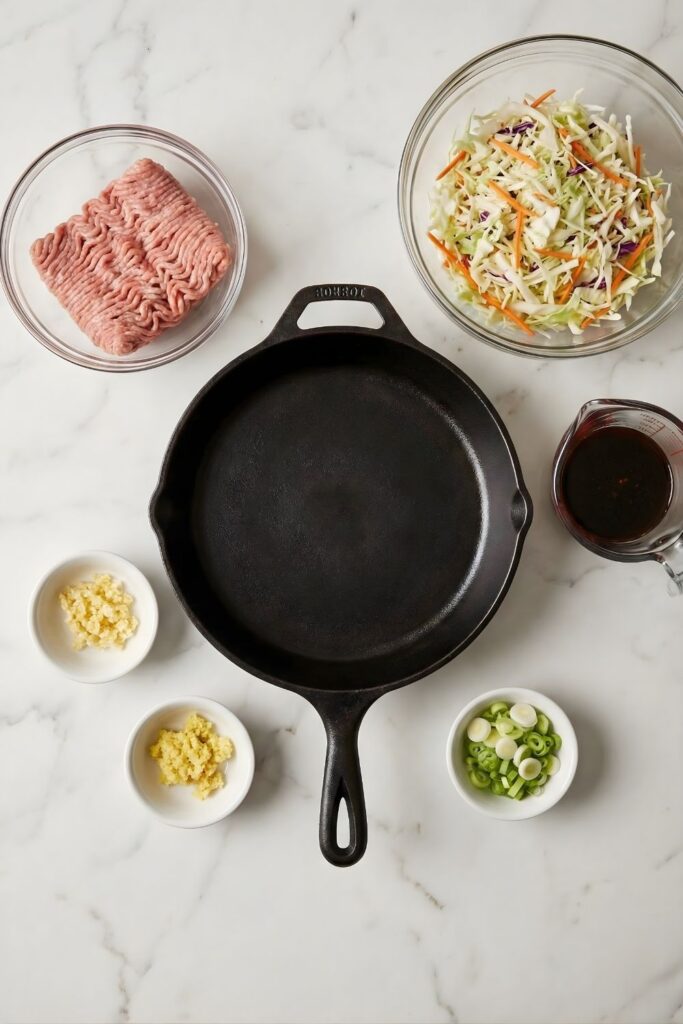
Success in high-heat cooking requires preparation. Once the heat is on, you will not have time to measure. Have your protein, your aromatics (garlic/ginger), your cabbage mix, and your sauce liquids pre-measured in separate vessels.
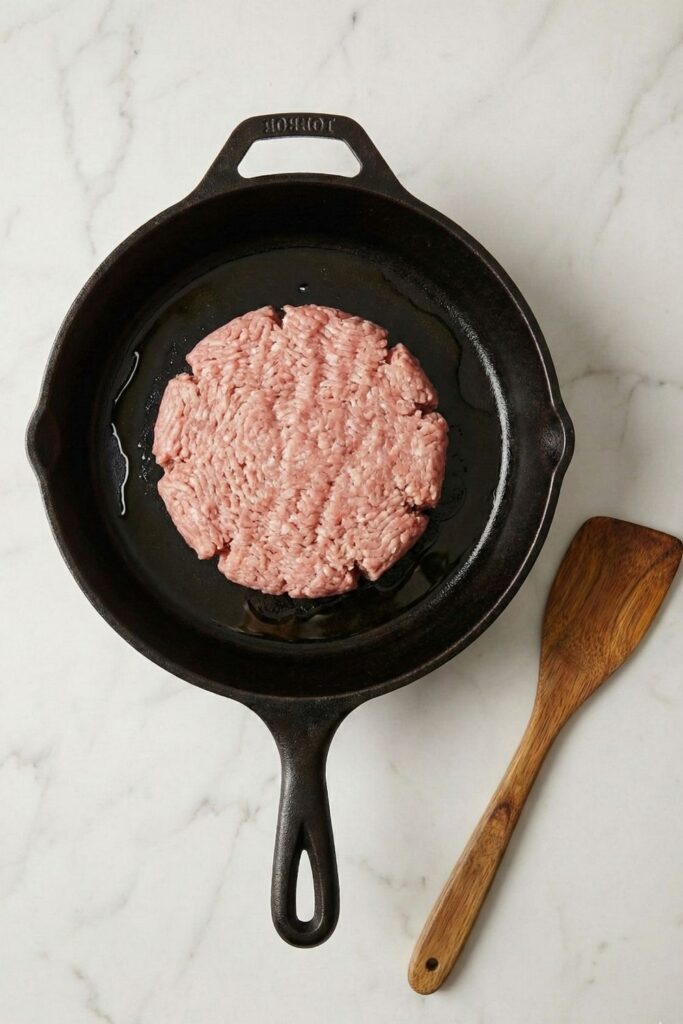
Heat your skillet to medium-high (375°F). Add the avocado oil. When the oil shimmers, add the meat. Do not break it up immediately. Press it flat into a single distinct layer, like a giant burger patty. We need maximum surface area contact to generate the crust.

Let the meat sear undisturbed for 3 minutes. When you flip it, you should see deep golden-brown edges. This is the Maillard reaction the flavor foundation of the entire dish. If the meat is grey, your pan was too cold.
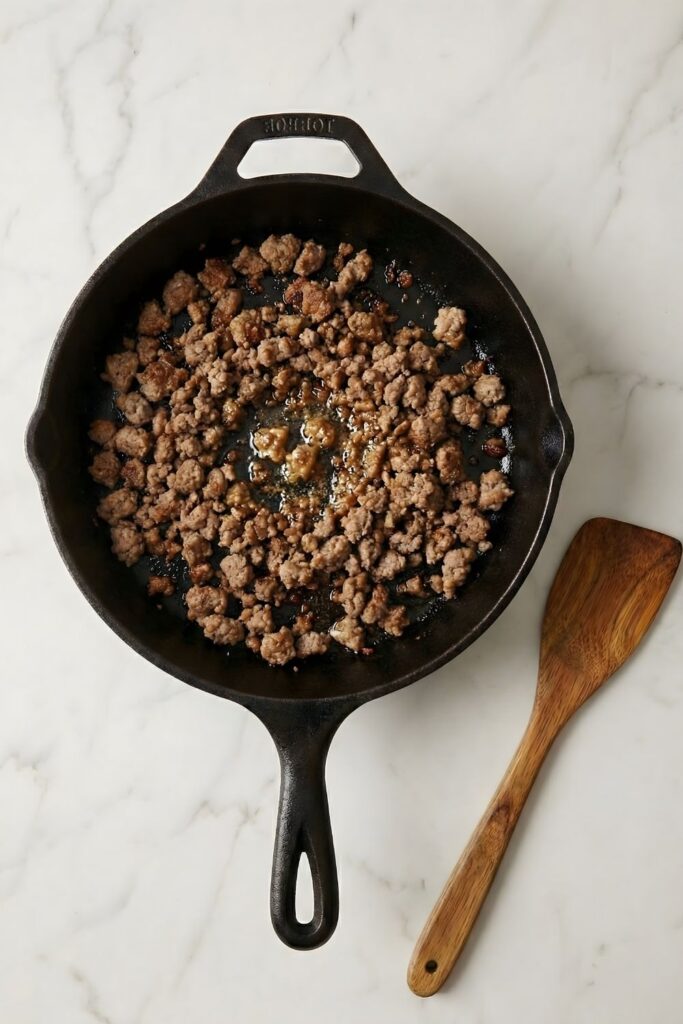
Once the crust is established, break the meat into uniform crumbles. Continue cooking until no pink remains and any excess water from the turkey/pork has fully evaporated. The sound of the pan should change from a “wet hiss” to a “dry crackle.”
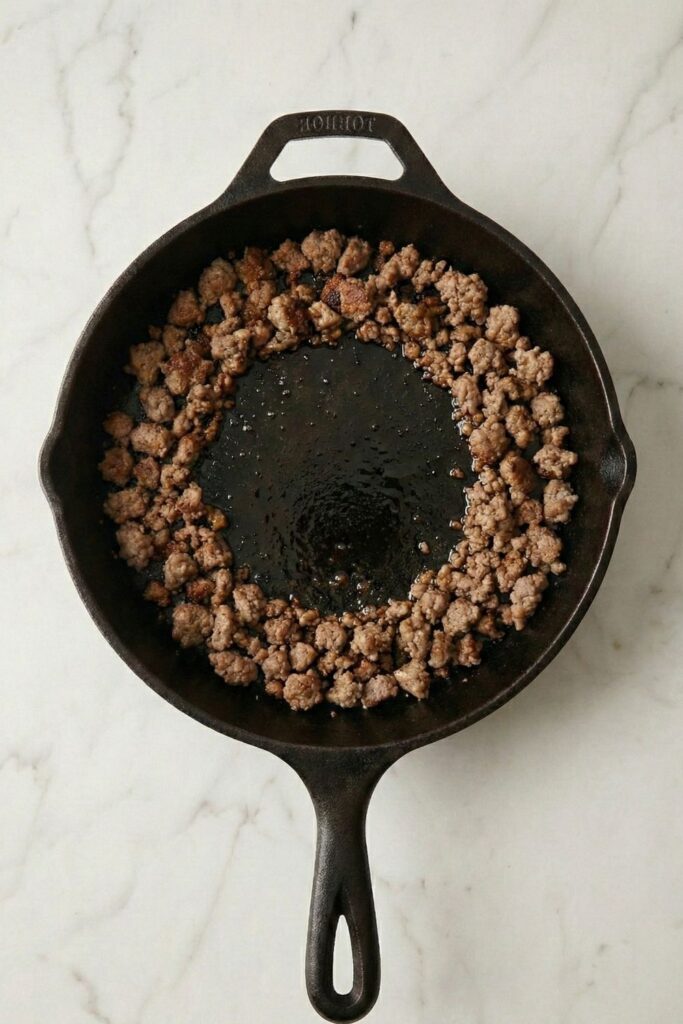
Push the cooked meat to the perimeter of the skillet. Create a clear, empty circle in the center of the pan. This technique allows us to fry the aromatics in direct heat rather than steaming them on top of the meat.
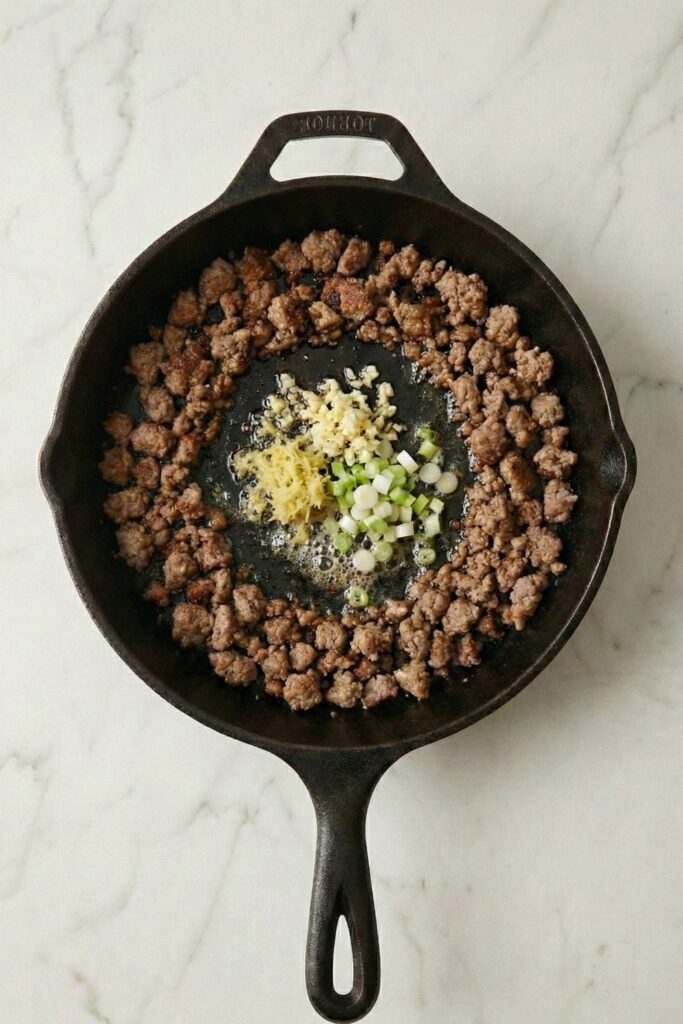
Add a teaspoon of oil to the center well if it looks dry. Drop in the ginger, garlic, and scallion whites. Cook for exactly 45 seconds. You are looking for a “bloom” the moment the smell shifts from raw and pungent to sweet and toasted.
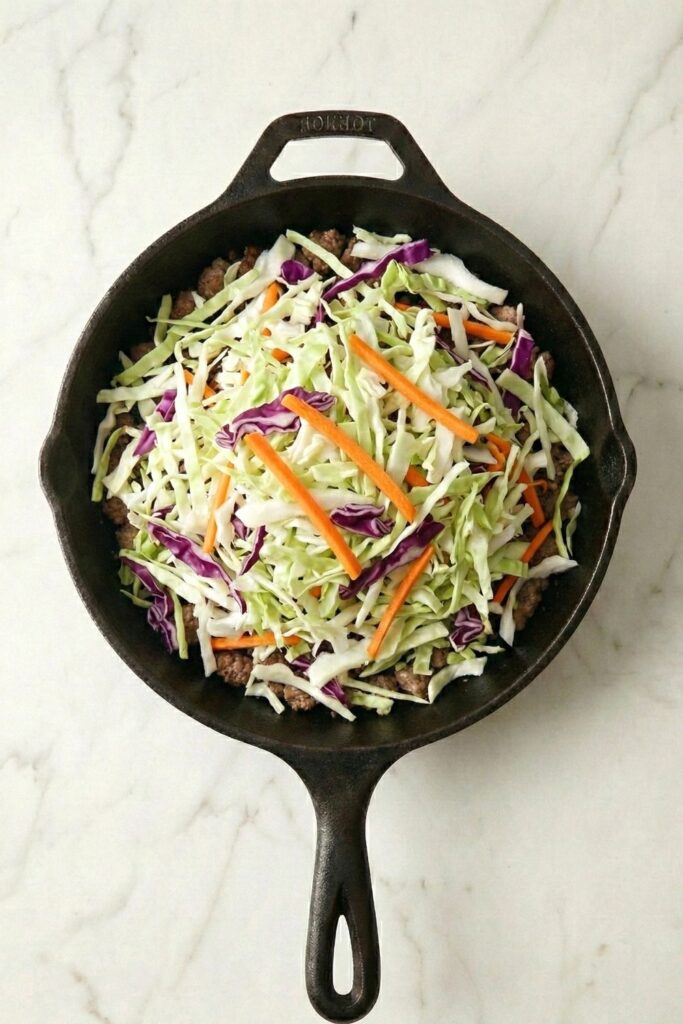
Dump the entire coleslaw mix into the pan. It will look like too much volume for the skillet this is normal. Do not panic. The water structure of the cabbage will collapse rapidly once heat is applied.
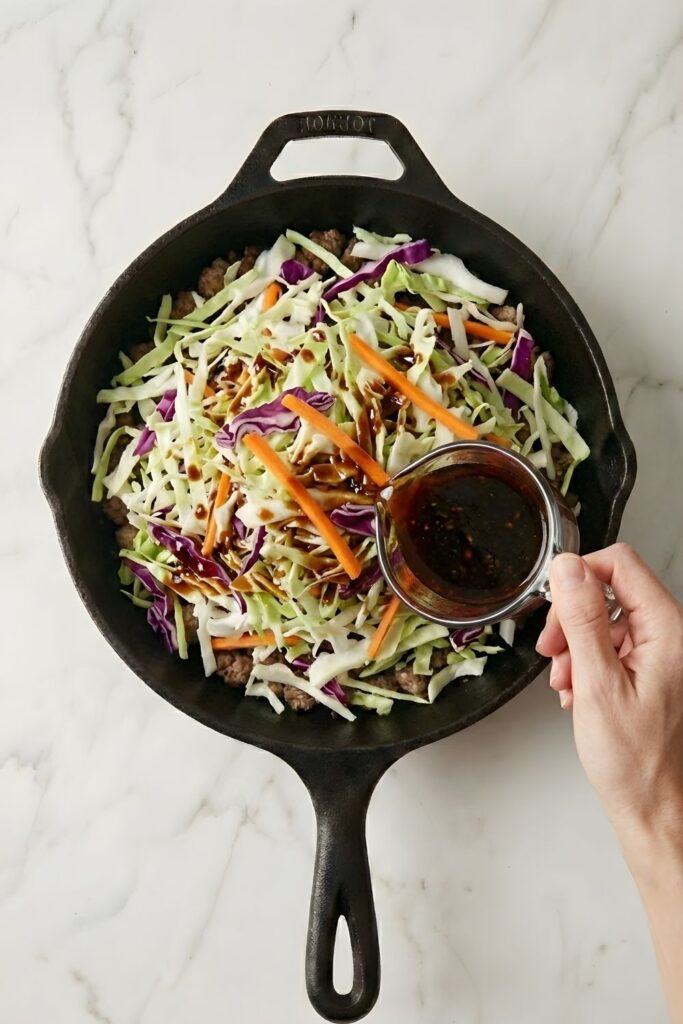
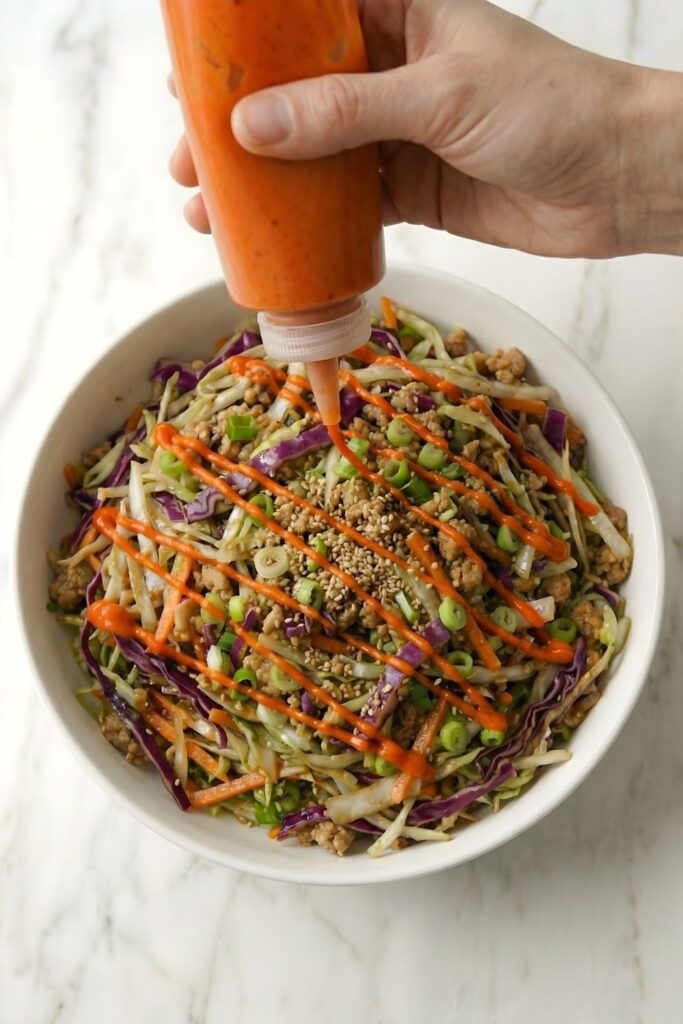
Immediately pour your pre-mixed liquids (soy sauce, rice vinegar, sriracha) over the raw cabbage. The salt in the soy sauce will begin to draw moisture out of the vegetable cells, accelerating the wilting process.
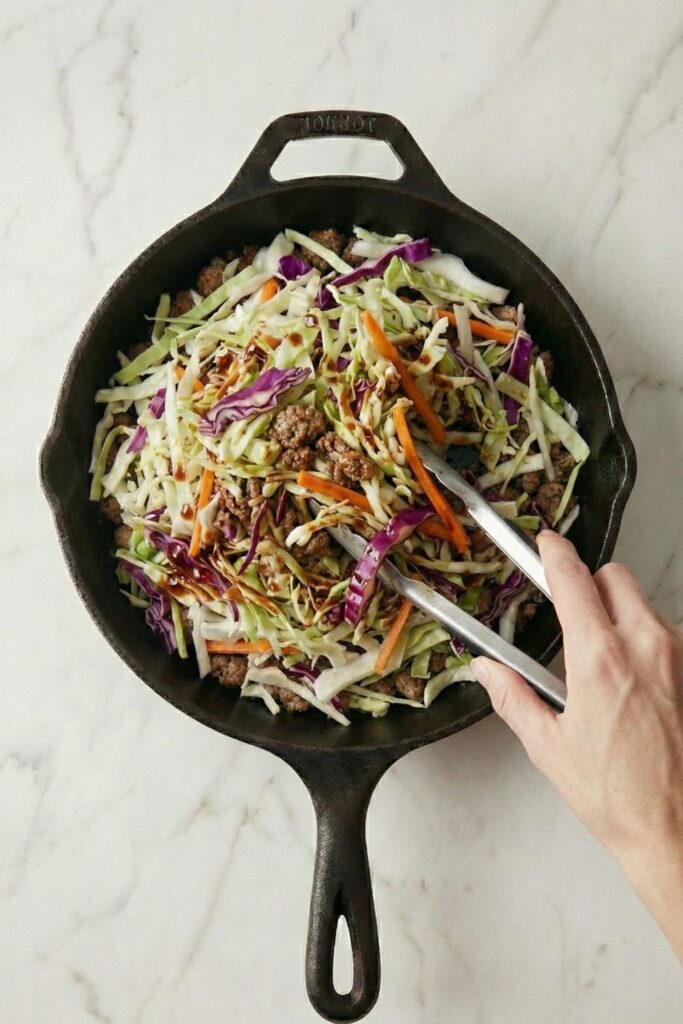
Use tongs to aggressively toss the mixture. You want to coat every strand of cabbage in the flavored oil and meat juices. Keep the mixture moving constantly to ensure the cabbage contacts the hot metal surface for an even cook.
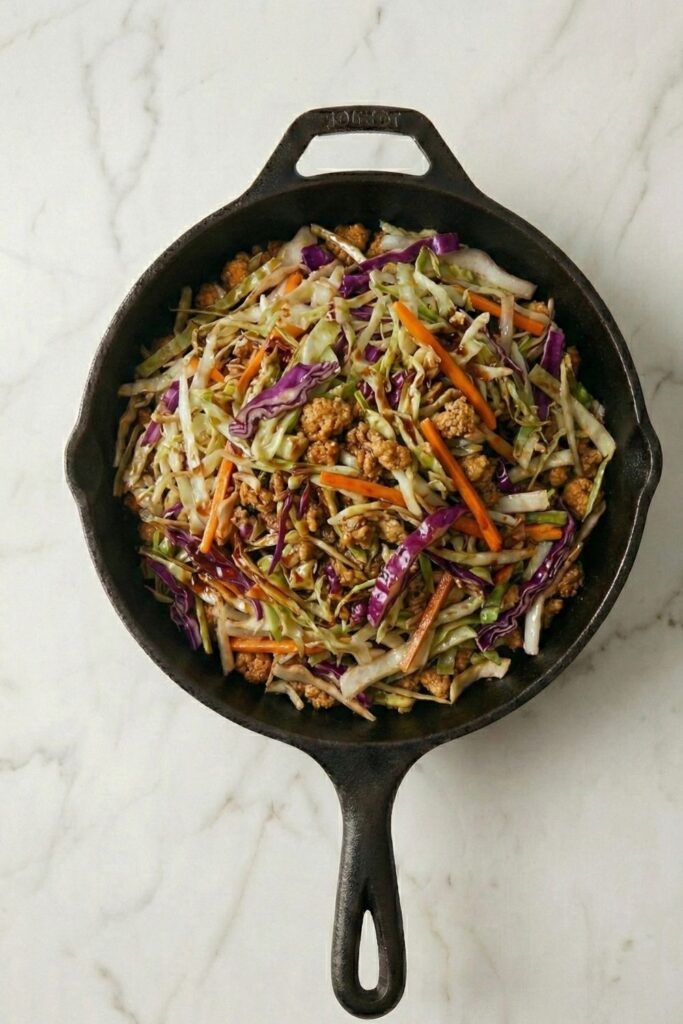
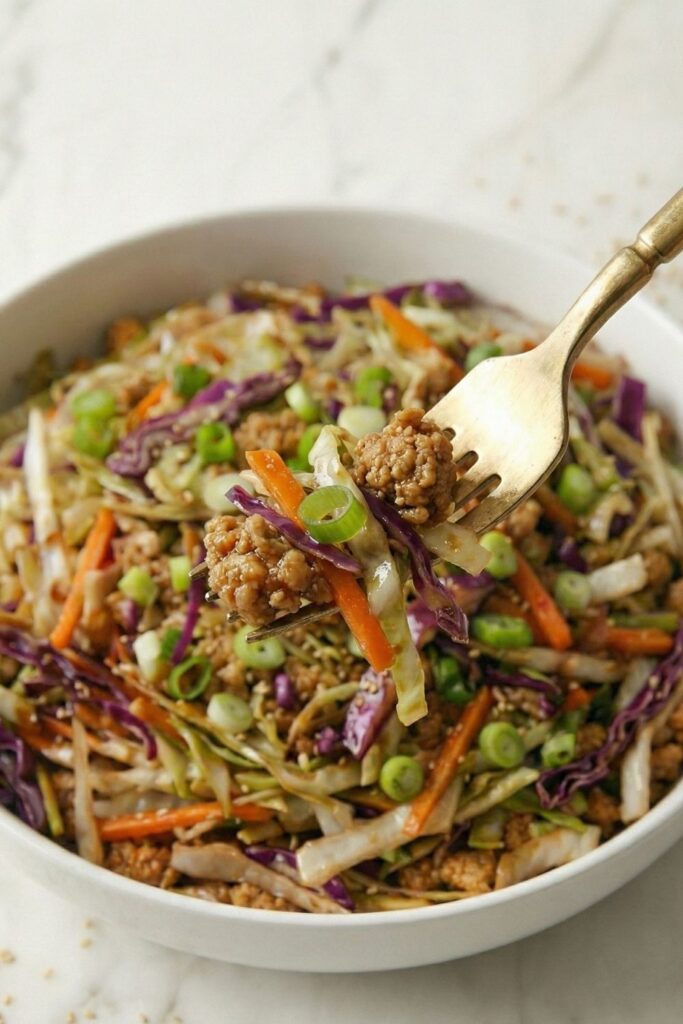
Stop cooking when the cabbage is “tender-crisp” wilted but still possessing a skeletal snap. Remove from heat immediately. Drizzle with the toasted sesame oil now (off-heat) to preserve its delicate nutty aroma, and garnish with the green onion tops.
Troubleshooting Guide
My cabbage turned into mush.
- The Diagnosis: You likely overcrowded the pan or cooked it on too low heat. Low heat promotes sweating; high heat promotes evaporation.
- The Fix: Next time, increase your heat to High. If you have a small burner, cook the cabbage in two separate batches, then combine them at the end.
The dish tastes bland.
- The Diagnosis: Sodium dilution. Cabbage is 92% water. As it cooks, it releases water, which dilutes your soy sauce.
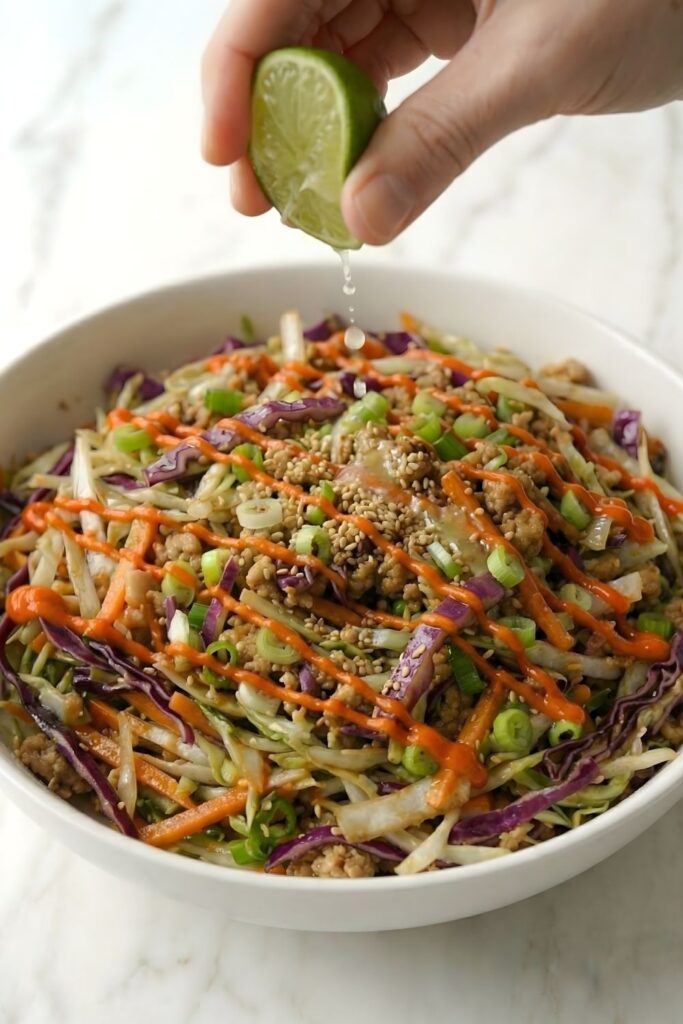
- The Fix: Do not just add more soy sauce (which adds salt). Add acid. A squeeze of fresh lime juice or a splash more rice vinegar will “wake up” the flavors without spiking the sodium levels.
The meat is dry and rubbery.
- The Diagnosis: Overcooking lean protein. If you used 99% lean turkey, it has zero fat to protect it from the heat.
- The Fix: For ultra-lean meats, mix 1 teaspoon of baking soda with the raw meat 15 minutes before cooking (a technique called “velveting”). This changes the pH of the meat and helps it retain moisture even under high heat.
There is a pool of liquid at the bottom of my bowl.
- The Diagnosis: The cabbage continued to release water after plating. This is natural osmosis.
- The Fix: Serve the dish with a slotted spoon to leave the excess “cabbage water” in the pan. Alternatively, simmer the sauce for 2 minutes before adding the cabbage to reduce it to a thicker glaze.
Serving & Storage Protocols
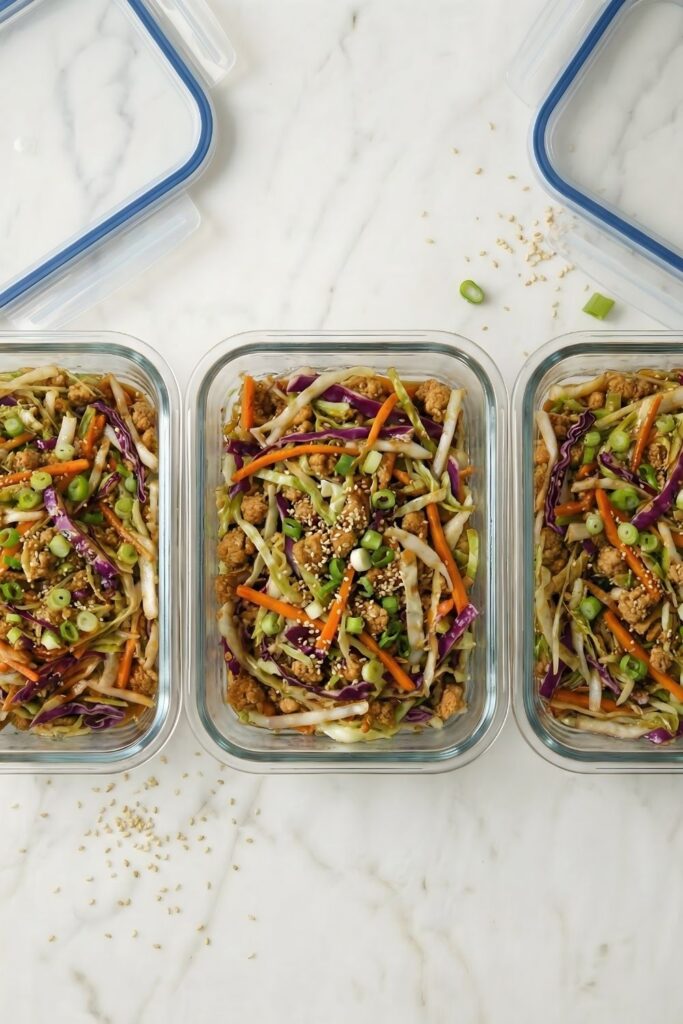
Storage Physics
This dish keeps well, but the texture degrades chemically over time. The salt in the soy sauce will continue to draw moisture out of the cabbage cells while it sits in the fridge.
- Refrigerator: Store in an airtight glass container for up to 4 days. Expect the texture to be softer on Day 2 than Day 1.
- Freezer: Do not freeze this dish. Upon thawing, the ice crystals that formed inside the cabbage cells will rupture the cell walls completely. The result will be a watery, unrecognizable mush.
Reheating Strategy
- The Skillet Method (Preferred): Reheat in a hot pan for 2 minutes. This drives off the excess moisture that accumulated during storage and re-crisps the edges.
- The Microwave: If you must microwave, use 50% power. High power will overcook the lean turkey, making it rubbery.
Serving Configurations
- The GLP-1 Plate: Serve purely as is. The volume is sufficient for a full meal.
- The Hyper-Responder: Serve over cauliflower rice to double the vegetable volume.
- The Carb-Cycling: Serve over a small portion of jasmine rice if you require the glycogen replenishment post-workout.
If you loved this recipe don’t forget to check my What I Eat on Tirzepatide: 140g Protein to Melt Fat this not only gives you a guide on how to hit 140g of protein but also help out if your on. GLP-1 Medication.
Frequently Asked Questions
Yes, this is actually preferred for speed. Look for the “Tri-Color” mix (green cabbage, red cabbage, carrots). Ensure the bag is dry and not sweating inside, which indicates age.
It is naturally Keto. For Whole30, you must substitute the Soy Sauce with Coconut Aminos and omit the Sriracha (or use a sugar-free hot sauce).
Absolutely. Ground beef (90/10) provides a richer flavor profile closer to a traditional egg roll. However, it increases the caloric density. If using beef, drain the excess fat after the searing step before adding the aromatics.
Yes, but be careful with moisture. Bell peppers and snap peas work well because they have similar cook times to cabbage. Avoid mushrooms, which release massive amounts of water and will steam the slaw.
Ginger has a high sugar content. If you add it at the same time as the raw meat, it will burn before the meat is cooked. Always add aromatics after the meat is browned, into the “well” we created, and cook for only 45-60 seconds.
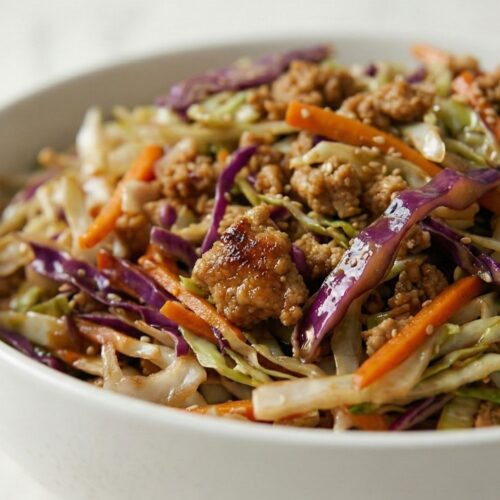
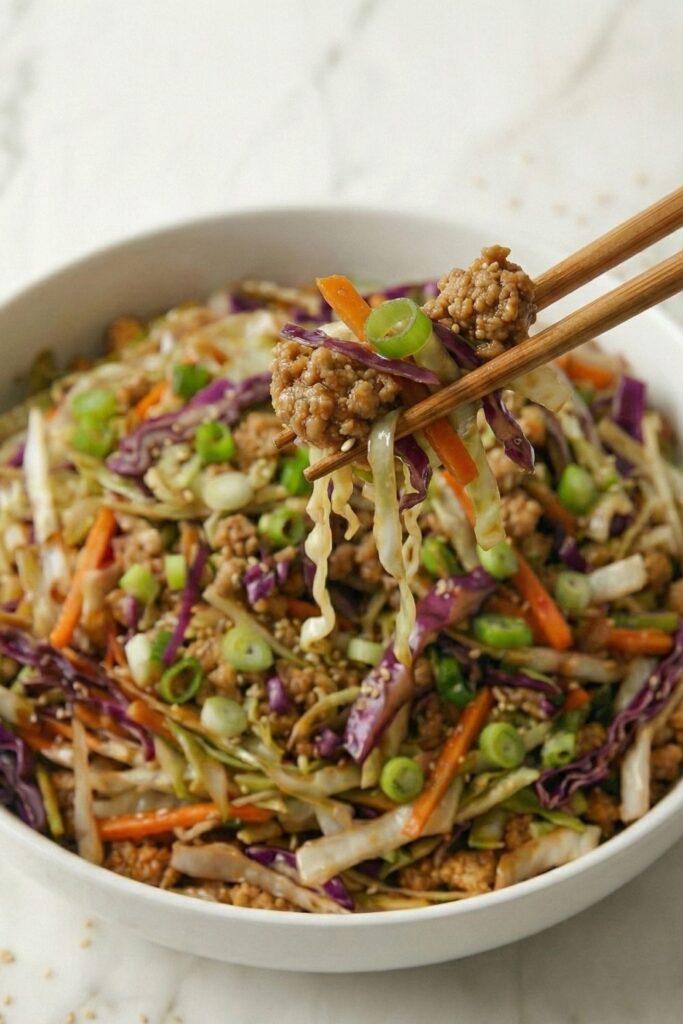
20-Minute Egg Roll in a Bowl (High Protein & GLP-1 Friendly)
Ingredients
The Protein Base
- 1 lb 93% Lean Ground Turkey or Ground Pork
- 1 tbsp Avocado Oil High smoke point
- 1/4 tsp Black Pepper
The Aromatic Core
- 1 tbsp Fresh Ginger grated (approx. 1-inch knob)
- 3 cloves Garlic minced
- 4 stalks Green Onions Scallions, sliced (separate white bottoms from green tops)
The Brassica Volume
- 14 oz Coleslaw Mix Green cabbage, red cabbage, carrots, bagged or fresh shredded
The Umami Glaze
- 1/4 cup Low Sodium Soy Sauce Use Tamari for Gluten-Free
- 1 tbsp Rice Vinegar Unsweetened
- 1 tsp Sriracha or Chili Paste Optional for thermogenic effect
The Finish (Off-Heat)
- 1 tsp Toasted Sesame Oil
- 1 tsp Toasted Sesame Seeds
Instructions
- Establish Mise-en-Place Before turning on the heat, pre-measure all ingredients into small pinch bowls. Combine the Soy Sauce, Rice Vinegar, and Sriracha in a small glass cup. Separate the white parts of the green onions from the green tops.
- The Hard Sear Heat the avocado oil in a large 12-inch skillet over medium-high heat. When the oil shimmers, add the ground turkey. Press it flat into a single “patty” layer to maximize contact with the metal. Do not touch it for 3 minutes. We require the Maillard reaction (deep browning) to develop flavor depth.
- Crumble and Crisp Once a dark golden crust has formed on the bottom, break the meat into uniform crumbles using a wooden spoon. Cook for another 2-3 minutes until the meat is fully opaque and any excess water has evaporated. The pan should sound “dry,” not sizzling wet.
- The Aromatic Bloom Push the cooked meat to the outer perimeter of the skillet, creating an empty “well” in the center. Add the grated ginger, minced garlic, and the white parts of the green onions into the hot center. Sauté for 45 seconds until fragrant. Do not let the garlic burn.
- The Brassica Load Dump the entire bag of coleslaw mix over the meat. Immediately pour the sauce mixture (Soy Sauce/Vinegar/Sriracha) over the cabbage. This liquid will steam-release the fond (browned bits) from the pan bottom.
- The Integration Toss Using tongs, toss the mixture aggressively to combine the meat and cabbage. Cook for 2-3 minutes. Stop cooking when the cabbage is “tender-crisp”—wilted but still retaining a skeletal snap.
- The Gloss Finish Remove the skillet from the heat entirely. Drizzle with the Toasted Sesame Oil and toss one final time to coat (this preserves the delicate nut solids). Garnish with the green onion tops and sesame seeds. Serve immediately.
Notes
- GLP-1 Optimization: To increase volume without calories, serve this over riced cauliflower. The fiber content combined with the protein creates a high satiety signal.
- Sodium Control: If using standard (full sodium) soy sauce, dilute with 1 tbsp water to prevent the dish from becoming too salty as the cabbage reduces.
- Storage Protocol: Store in airtight glass containers for up to 4 days. Reheat in a skillet for 2 minutes to drive off excess moisture; microwaving may result in a softer texture.
- Texture Troubleshooting: If your cabbage releases too much water (resulting in a soupy bottom), use a slotted spoon to serve. This often happens if the pan wasn’t hot enough or if the cabbage was frozen.
Equipment
- 12-Inch Stainless Steel Skillet or Cast Iron Pan (Wide surface area is mandatory for evaporation)
- Microplane / Grater
- Stainless Steel Tongs (Silicone tipped preferred)
- Small Glass Pinch Bowls (For Mise-en-place)
- Glass meal prep containers
Nutrition Information (Per Serving)
- Calories: 245
- Fat: 12g
- Saturated Fat: 2g
- Carbohydrates: 10g
- Fiber: 3g
- Sugar: 4g
- Protein: 24g
- Cholesterol: 65mg
- Sodium: 680mg