Let’s be honest: we have all been there. You finish a long day, maybe you crushed a leg workout, and you are staring into the freezer praying for a tub of Ben & Jerry’s to magically appear. But you have goals. You want to hit your macros, keep your sugar low, and stay on track with your weight loss journey.
For years, I struggled to find a “healthy” ice cream that didn’t taste like frozen sadness. Most high-protein ice cream recipes on the internet are lies. They tell you to blend ice and protein powder, and what you get is a watery, icy slush that melts into a puddle in two minutes. Or worse, you freeze it, and it turns into a rock-hard brick that bends your spoon.
Jump to RecipeI remember specifically during my own weight loss phase, my sweet tooth would wake up at exactly 8 PM. And tried freezing regular yogurt cups, but they were icy and unsatisfying. I needed something that felt indulgent something rich, thick, and spoon able but that actually contributed to my protein intake rather than destroying it. After testing dozens of ratios (and breaking one cheap blender), I finally cracked the code.
This isn’t just a smoothie in a bowl. This is legitimate, creamy, scoop able ice cream that packs over 30 grams of protein and takes less than 5 minutes to prep. Whether you are on a GLP-1 journey, doing Keto, or just want a dessert that works for your body, this is it.
Why This Recipe Actually Works (The Science)
You might be wondering, “Abby, why is your recipe different from the thousands of others?“
The secret comes down to food chemistry. Most failed protein ice creams lack two things: Fat and Stabilizers.
- The Protein Source Matters: We aren’t just using Whey protein here. Whey is thin and watery. By using a combination of Cottage Cheese or Greek Yogurt with a Whey/Casein blend, we add “body” to the ice cream. The casein protein found in dairy creates a thicker, slower-digesting fluff that mimics the mouthfeel of real cream.
- The “Anti-Ice” Secret: The biggest mistake people make is skipping the stabilizer. Real ice cream has sugar and fat to keep it soft. Since we are removing those, we need a binder. This recipe uses Xanthan Gum (or sugar-free pudding mix). This is the game-changer. It binds the water molecules to the protein so they can’t form sharp ice crystals. This is how you get that “soft serve” texture without an ice cream machine.
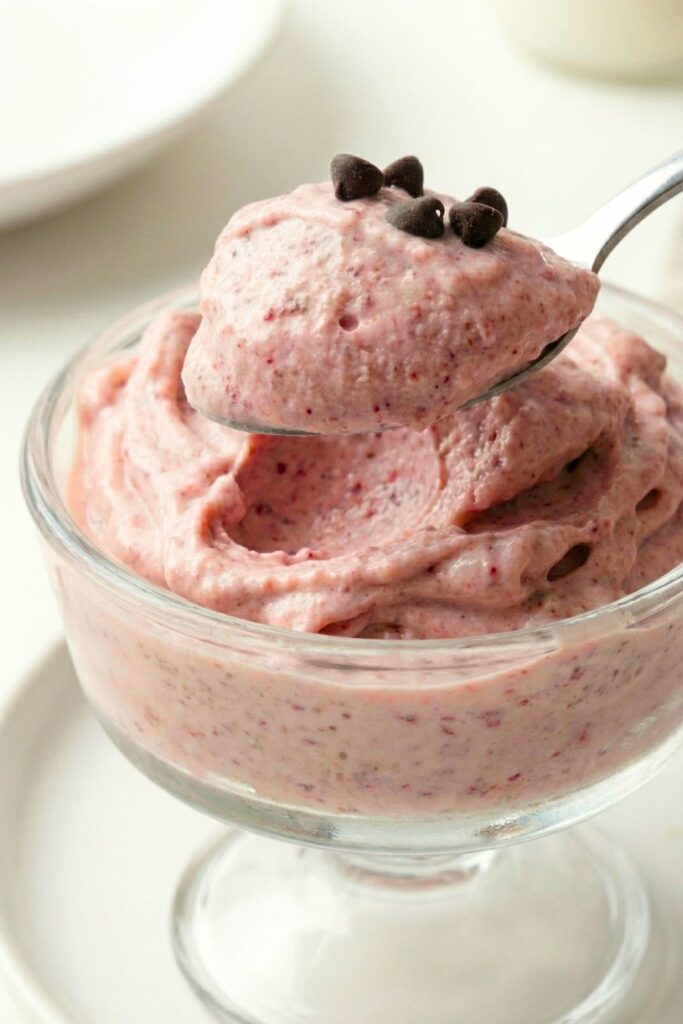
The texture is incredibly dense and velvety think Dairy Queen Blizzard meets cheesecake. It doesn’t dissolve instantly in your mouth; it has that luxurious “chew” that premium ice cream has. The flavor is rich and milky, with absolutely no chalky aftertaste, provided you use a high-quality protein powder.

The Key Ingredients (And Where to Get Them)
To get the perfect 10/10 result, you cannot swap these blindly. Here is exactly what you need and why.
(Note: Affiliate links included below to the exact products I use)
- The Base: Low-Fat Cottage Cheese (or Greek Yogurt)
- Why: This provides the creamy base. Cottage cheese is superior because the curds blend into a rich cheesecake-like batter that freezes softer than yogurt.
- Recommendation: I use Daisy Low Fat Cottage Cheese because it has no added gums or weird fillers. If you hate cottage cheese, use Fage 0% or 2% Greek Yoghurt
- The Protein: Whey/Casein Blend
- Why: Do not use 100% Whey Isolate if you can avoid it; it puffs up too much (like air). A blend (usually 60% whey, 40% casein) creates a thick, custard-like texture.
- Recommendation: PEScience Select Protein (Gourmet Vanilla Chocolate) or Quest Nutrition Protein Powder. These bake and blend the best.
- The Stabilizer: Xanthan Gum or Jell-O Pudding Mix
- Why: This prevents the “icy” texture. You only need a tiny pinch.
- Recommendation: Anthony’s Organic Xanthan Gum. One bag will last you years. Alternatively, use 1 tbsp of Sugar-Free White Chocolate or Vanilla Jell-O Pudding Mix.
- The Sweetener: Allulose or Powdered Erythritol
- Why: Regular sugar keeps ice cream soft. To replace it, Allulose is the gold standard because it doesn’t crystallize when frozen like Stevia does.
- Recommendation: Wholesome Sweeteners Allulose
- The Liquid: Unsweetened Almond Milk
- Why: Lowest calories. You can also use Fairlife Milk for extra protein.
- Recommendation: Almond Breeze Unsweetened
Step-by-Step Instructions (The “No-Fail” Method)
Follow these steps exactly. The order you put ingredients in the blender matters!
Step 1: Prepare Your Equipment
You do not need a Ninja Creami for this version (though I have instructions for that below!), but you do need a high-speed blender. A Ninja BN701 or a Vitamix is ideal.
- Pro Tip: If you have time, place your serving bowl in the freezer for 10 minutes beforehand. This keeps your ice cream from melting while you eat it.
Step 2: The “Liquid First” Rule
Pour your liquid ingredients into the blender first. This prevents the powder from getting stuck at the bottom near the blades.
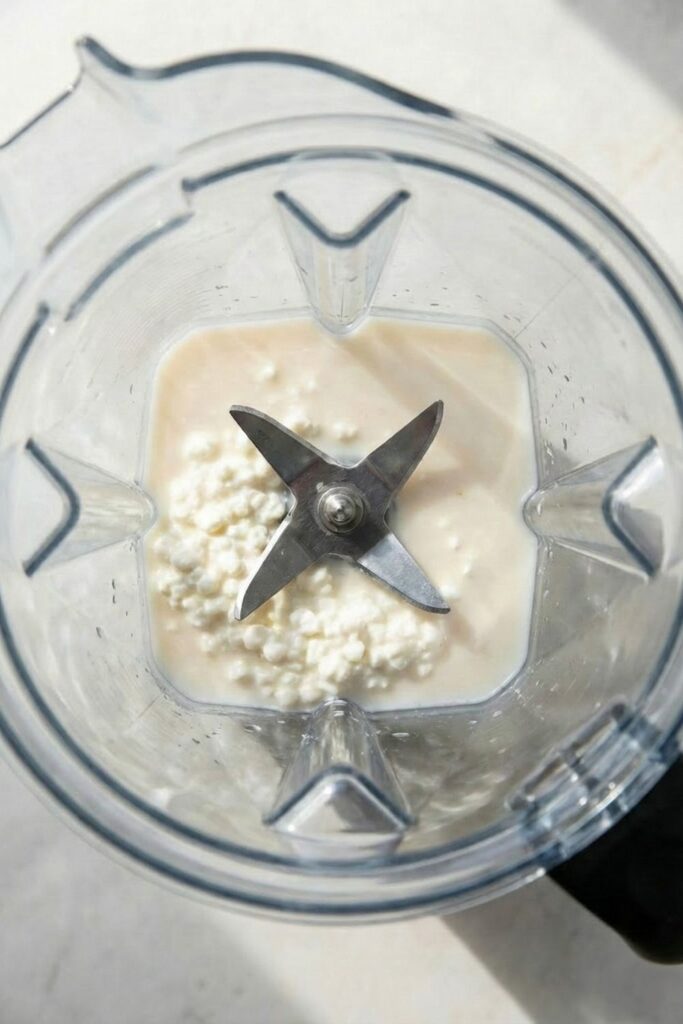
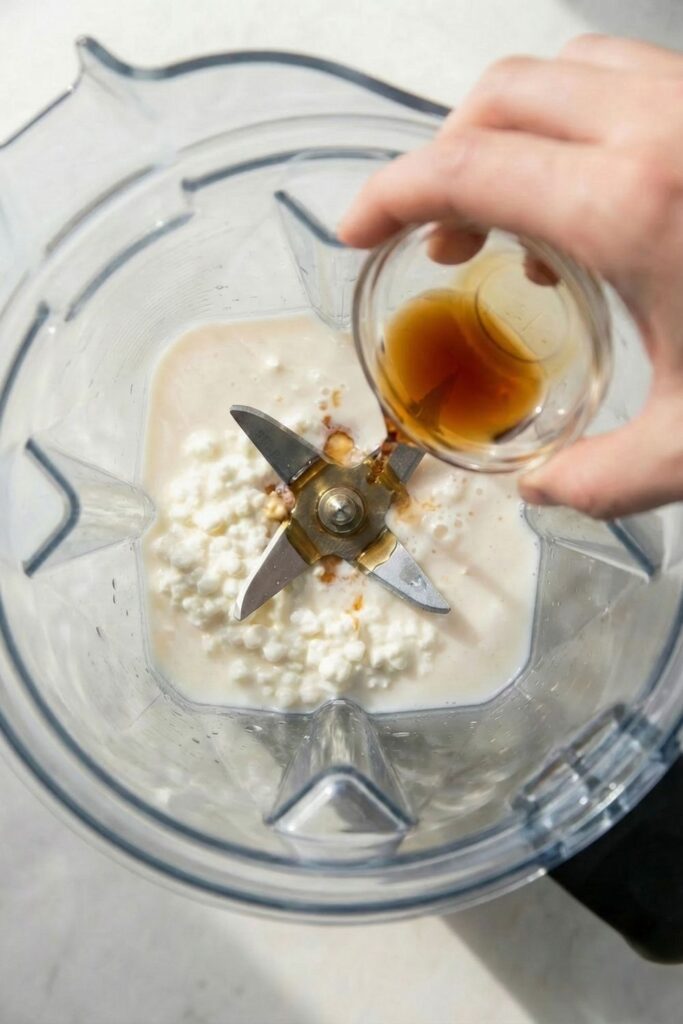
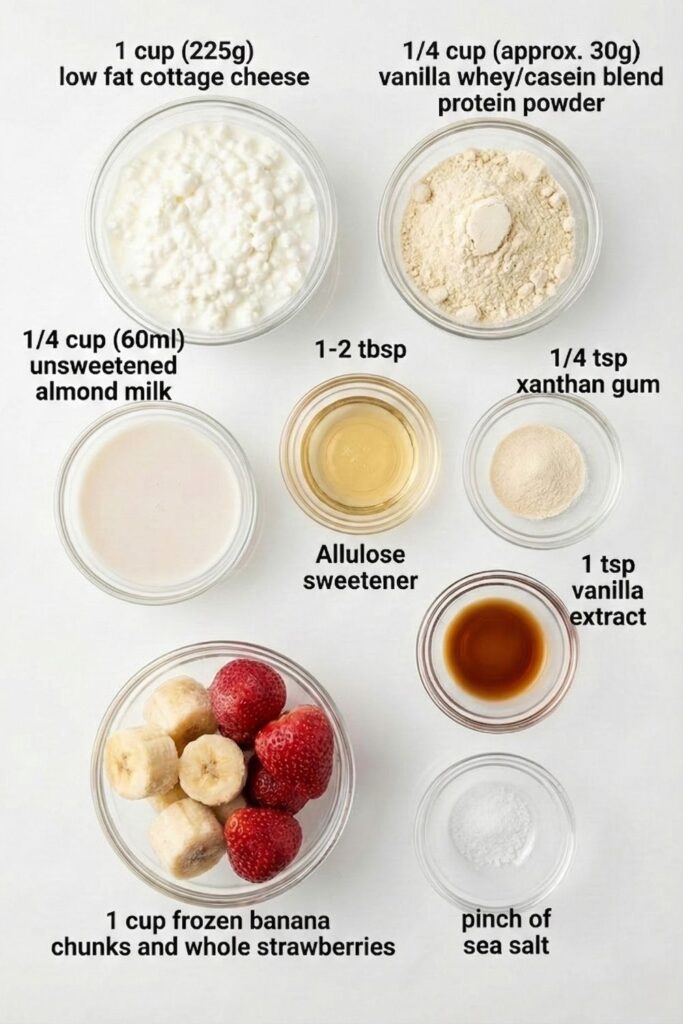
- Add 1/4 cup Unsweetened Almond Milk. (Start with less! You can always add more, but you can’t take it out).
- Add 1 cup (225g) Cottage Cheese or Greek Yogurt.
- Add 1 tsp Vanilla Extract.
Step 3: Add Dry Ingredients
Now, pile the dry ingredients on top of the liquid/cheese base.
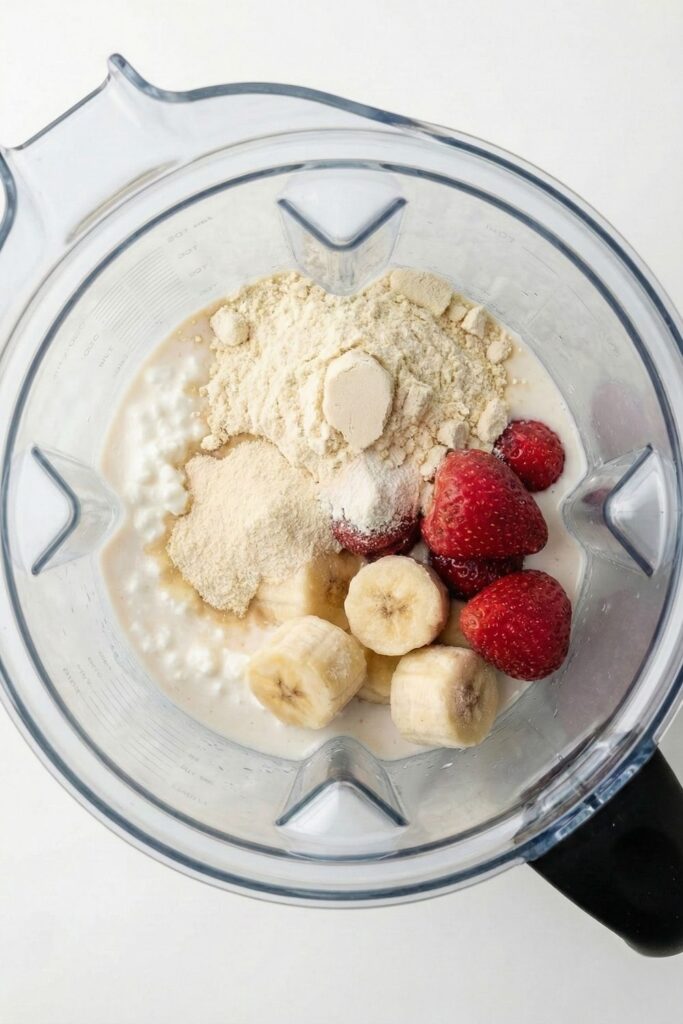
- Add 1 scoop (approx. 30-32g) Protein Powder.
- Add 1-2 tbsp Allulose (to taste).
- Add 1/4 tsp Xanthan Gum (careful not to add too much, or it gets gummy!).
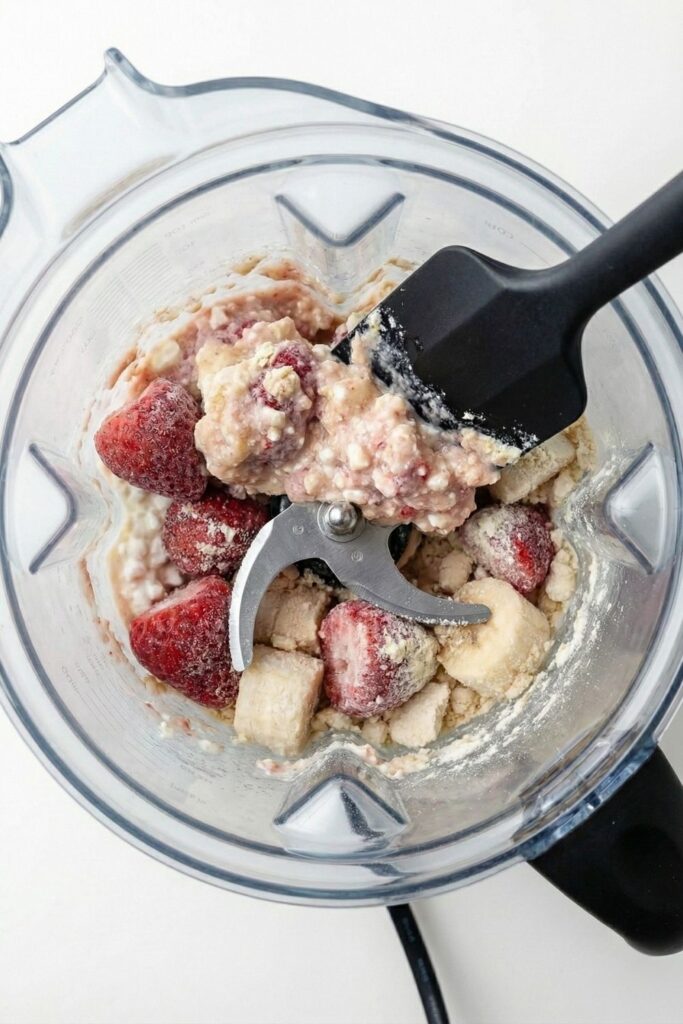
- Optional: Add 1 cup Frozen Fruit (Bananas for creaminess, Strawberries for volume). If you want a low-carb version, skip the fruit and add 1 cup of Ice Cubes.
Step 4: The Pulse and Blend
This is where the magic happens.
- Pulse the blender 3-5 times to break up the frozen fruit or ice.
- Turn the blender to Low speed. Use your tamper (the stick that comes with the blender) to push the ingredients down into the blades. It will look too thick at first keep pushing!
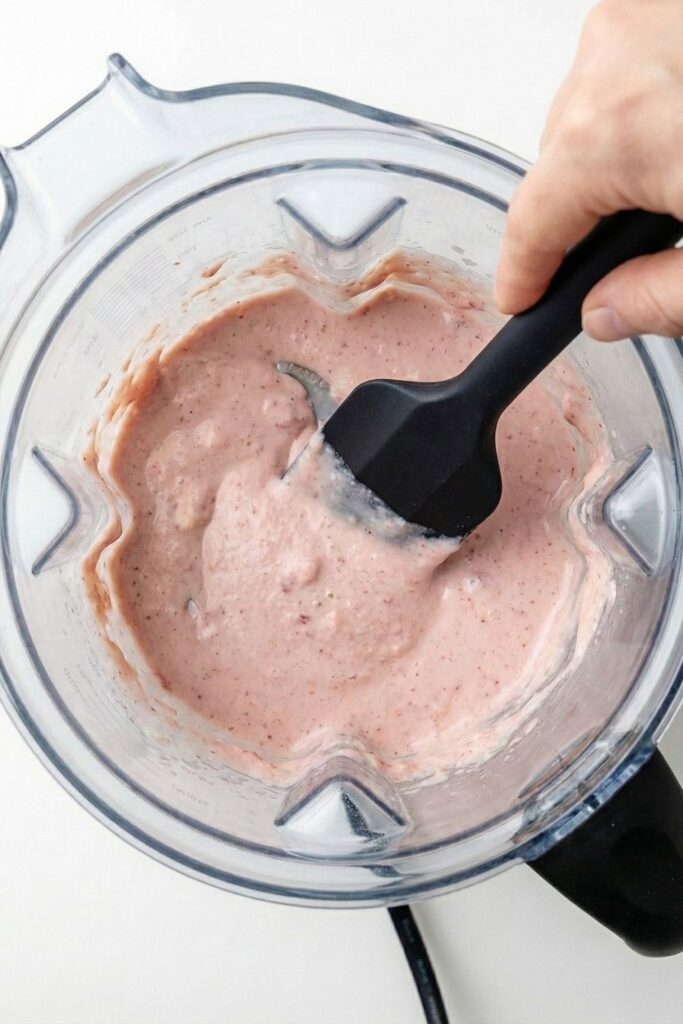
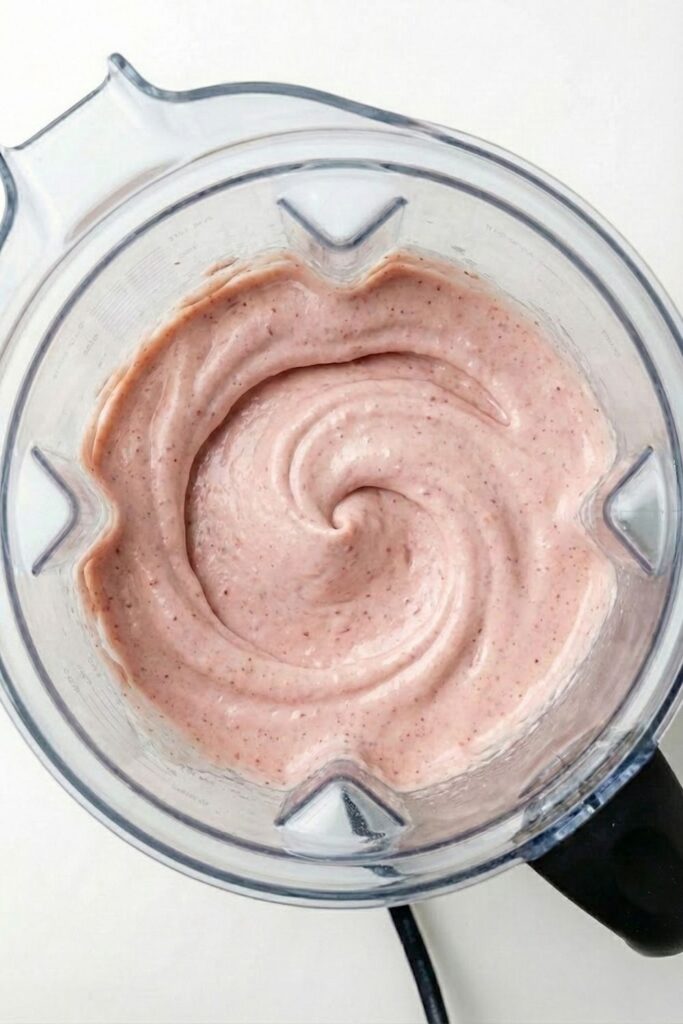
- Slowly increase speed to High. Blend for 45-60 seconds.
- Crucial Check: The mixture should quadruple in volume and look glossy. If the blades are spinning freely without catching food, stop and add 1 tbsp of almond milk.
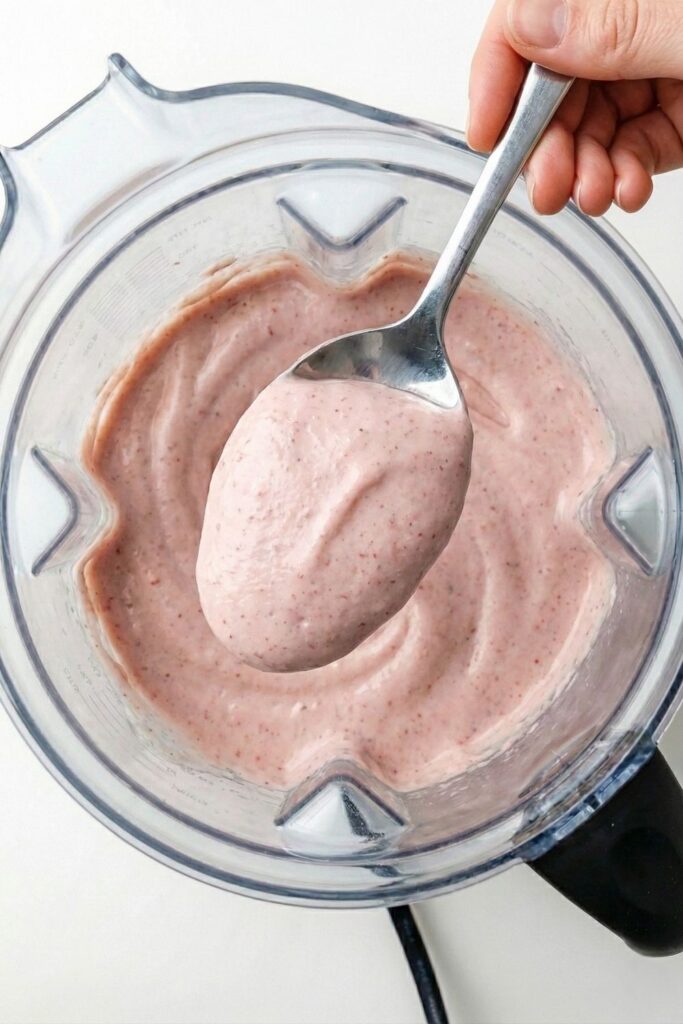
Step 5: The Texture Check
Stop the blender. Dip a spoon in. It should be thick enough that it doesn’t fall off the spoon when you turn it upside down (like a Blizzard).
- Too Runny? Add a handful more ice or frozen fruit.
- Too Gummy? You likely added too much Xanthan gum. Add a splash of milk to thin it out.
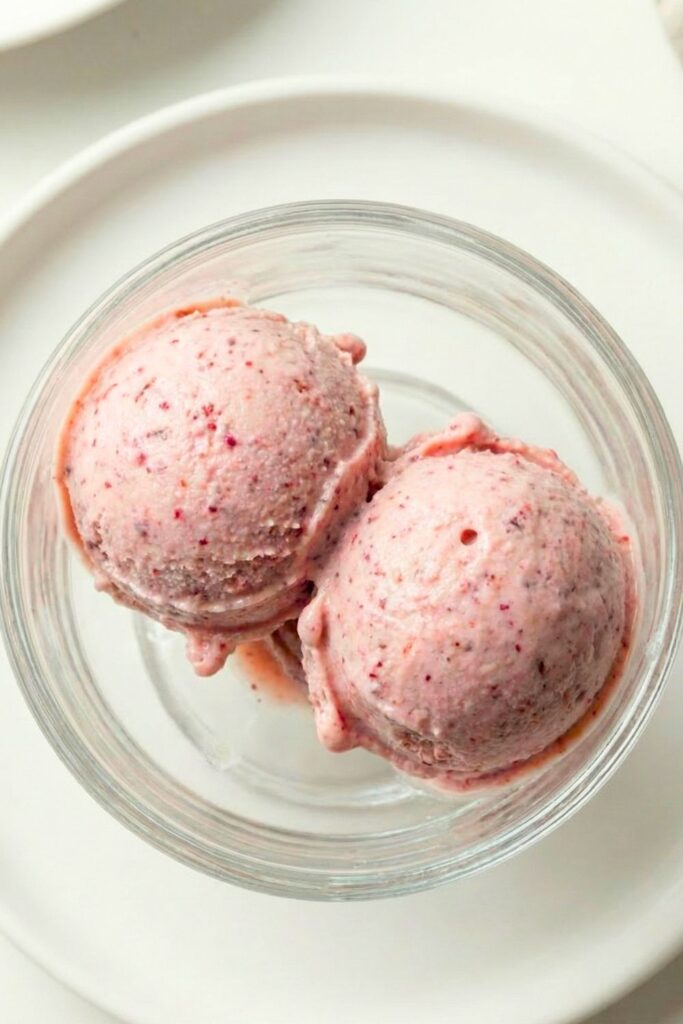
Step 6: The Freezing Strategy (Optional)
You can eat it immediately as “Soft Serve.” However, for a scoopable ice cream texture:

- Pour the mixture into a container / loaf pan.
- Cover with plastic wrap (press the wrap directly onto the surface of the ice cream to prevent freezer burn).
- Freeze for 30-60 minutes.
- Do not freeze overnight without expecting it to get hard. If you do freeze it overnight, you must let it sit on the counter for 15-20 minutes to thaw before scooping.
Nutrition (Per Serving)
- Calories: 280
- Sugar: 6g
- Sodium: 380mg
- Fat: 6g
- Carbohydrates: 18g
- Fiber: 4g
- Protein: 32g
Can I Make This In A Ninja Creami?
Absolutely! In fact, this recipe is even better in a Ninja Creami because the machine shaves the ice crystals for you.
Ninja Creami Instructions:
- Blend all ingredients (skip the ice/frozen fruit) until smooth.
- Pour into your Ninja Creami pint container.
- Freeze for 24 hours flat (do not cheat this time!).
- Spin on the “Lite Ice Cream” setting.
- It will look powdery after the first spin. Add 1 tbsp of liquid and run a “Re-Spin”.
- Result: The smoothest, most premium texture possible.
Flavour Variations to Try
Don’t get bored with just vanilla! Here are my favorite macro-friendly twists:
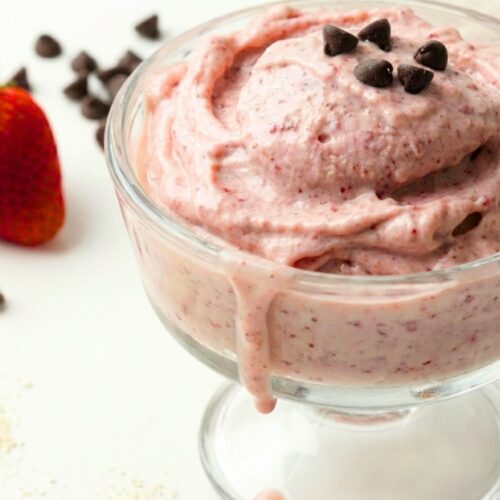
- The Chocolate Peanut Butter Cup: Use Chocolate Protein Powder, add 1 tbsp Cocoa Powder, and swirl in 1 tbsp PB2 (Powdered Peanut Butter). Top with a crushed sugar-free peanut butter cup.
- The Strawberry Cheesecake: Use Vanilla Protein Powder, Cottage Cheese base, and 1 cup frozen strawberries. Top with crushed graham cracker crumbs.
- The “Oreo” McFlurry: Use Cookies & Cream Protein Powder. After blending, pulse in one crushed High-Key Sandwich Cookie (Low carb Oreo alternative).
Final Thoughts: Is It Worth The Hype?
If you have been paying $6 or $7 for those “diet” ice cream pints at the grocery store, this recipe is going to change your life (and your grocery budget). Not only is it significantly cheaper to make at home, but the texture is genuinely superior.
Honestly, this tastes way creamier than Halo Top and doesn’t have that weird protein aftertaste.
Because we are using real food ingredients like cottage cheese and fruit, you get a dessert that feels nourishing, not chemical. It’s the perfect way to hit your protein goal for the day while feeling like you are cheating on your diet.
If you try this recipe, please leave a comment and a 5-star rating below! It helps other readers find the recipe and helps me know what flavors you want to see next.
Now, go check your freezer you probably have everything you need to make this right now! Or you shop for ingredients links are embedded on it to get the right products correctly

Frequently Asked Questions
Yes! Swap the Cottage Cheese for a high-protein Vegan Yogurt (like Siggi’s Plant-Based) or silken tofu. Use a Vegan Protein Powder (blend of Pea/Rice is best).
Note: Vegan protein absorbs more liquid, so you may need an extra splash of almond milk.
This usually happens for two reasons: 1) You used too much liquid (water freezes into ice), or 2) You skipped the stabilizer (Xanthan gum/Pudding mix). Make sure you are using frozen fruit or ice to create that thick emulsion.
This recipe is high in protein and fiber but low in sugar. The high protein content (30g+) helps trigger satiety hormones (GLP-1), keeping you fuller for longer than regular ice cream would.
The Creamiest High Protein Ice Cream (No Ice Maker & 30g Protein)
Equipment
- High-Speed Blender (Vitamix or Ninja)
- Spatula / Tamper
- Measuring Cups
Ingredients
The Base:
- 1/4 cup Unsweetened Almond Milk approx. 60ml – plus more if needed for blending
- 1 cup Low Fat Cottage Cheese 225g – I use Daisy brand for best texture
- 1 tsp Vanilla Extract
The Dry Mix:
- 1 scoop Vanilla Protein Powder approx. 30g – Use a Whey/Casein blend like PEScience for creaminess
- 1-2 tbsp Allulose Sweetener – or sweetener of choice to taste
- 1/4 tsp Xanthan Gum – Essential for preventing ice crystals!
- 1 pinch Sea Salt – Enhances the sweetness
The Volume (Choose One):
- 1 cup Frozen Strawberries – For volume and fruit flavor
- 1 cup Frozen Banana Slices – For extra creaminess
- 1 cup Ice Cubes – For the lowest calorie/carb option
Instructions
- Prepare Your Equipment Place your serving bowl in the freezer to chill. This prevents your ice cream from melting the moment it hits the bowl. Ensure your blender is clean and dry.
- Add Liquids First (Crucial Step) Pour the 1/4 cup almond milk, 1 cup cottage cheese, and 1 tsp vanilla extract into the blender first. Adding liquids to the bottom prevents the protein powder from clumping or getting stuck under the blades.
- Layer the Dry Ingredients Add the 1 scoop protein powder, 1-2 tbsp sweetener, 1/4 tsp xanthan gum, and salt on top of the liquid base. Finally, add your choice of frozen fruit or ice cubes on top of everything.
- Pulse to Break Down Pulse the blender 3 to 5 times. You want to break up the large chunks of fruit/ice until the mixture looks chunky and crumbly. Do not panic if it looks dry here—this is normal!
- Blend and Tamp Turn the blender to High speed. Immediately use your tamper (the plastic stick) to push the ingredients vigorously down into the blades.
- The Texture Check Blend for 45-60 seconds total. Stop when the mixture has quadrupled in volume and looks glossy and smooth, like soft-serve. Dip a spoon in—if you can turn the spoon upside down and the ice cream doesn’t fall, it is ready.
- Freeze (Optional for Scoops) For a soft-serve texture, eat immediately. For scoopable ice cream, transfer the mixture to a container and freeze for 20-30 minutes.
Notes
- Ninja Creami Instructions: If using a Ninja Creami, skip the ice/frozen fruit. Blend the dairy base, protein, and sweetener until smooth. Pour into a pint container and freeze for 24 hours. Spin on “Lite Ice Cream,” add 1 tbsp milk, and “Re-Spin” for the perfect texture.
- Dairy-Free Option: Substitute cottage cheese with a high-protein vegan yogurt (like Siggi’s Plant-Based) and use a vegan protein blend. You may need slightly less liquid.
- Why Cottage Cheese? It provides a cheesecake-like tang and a creamier texture than Greek yogurt due to the casein protein content. If you absolutely hate cottage cheese, you can swap it 1:1 for 2% Greek Yogurt.
- Storage: Best eaten fresh! If you must store it, press plastic wrap directly onto the surface of the ice cream before freezing to prevent freezer burn.
