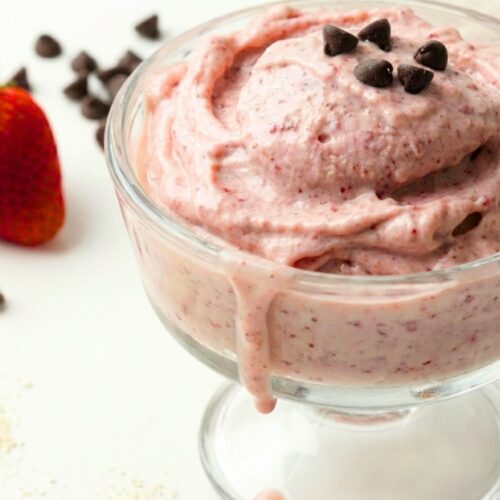
The Creamiest High Protein Ice Cream (No Ice Maker & 30g Protein)
Finally, a high protein ice cream recipe that isn't icy! This creamy 5-minute dessert is made with cottage cheese or Greek yogurt for a rich, cheesecake-like texture. Packed with 30g+ of protein and GLP-1 friendly, it satisfies sweet cravings without the sugar crash. No ice cream maker required just a blender!
Equipment
- High-Speed Blender (Vitamix or Ninja)
- Spatula / Tamper
- Measuring Cups
Ingredients
The Base:
- 1/4 cup Unsweetened Almond Milk approx. 60ml - plus more if needed for blending
- 1 cup Low Fat Cottage Cheese 225g - I use Daisy brand for best texture
- 1 tsp Vanilla Extract
The Dry Mix:
- 1 scoop Vanilla Protein Powder approx. 30g - Use a Whey/Casein blend like PEScience for creaminess
- 1-2 tbsp Allulose Sweetener - or sweetener of choice to taste
- 1/4 tsp Xanthan Gum - Essential for preventing ice crystals!
- 1 pinch Sea Salt - Enhances the sweetness
The Volume (Choose One):
- 1 cup Frozen Strawberries - For volume and fruit flavor
- 1 cup Frozen Banana Slices - For extra creaminess
- 1 cup Ice Cubes - For the lowest calorie/carb option
Instructions
- Prepare Your Equipment Place your serving bowl in the freezer to chill. This prevents your ice cream from melting the moment it hits the bowl. Ensure your blender is clean and dry.
- Add Liquids First (Crucial Step) Pour the 1/4 cup almond milk, 1 cup cottage cheese, and 1 tsp vanilla extract into the blender first. Adding liquids to the bottom prevents the protein powder from clumping or getting stuck under the blades.
- Layer the Dry Ingredients Add the 1 scoop protein powder, 1-2 tbsp sweetener, 1/4 tsp xanthan gum, and salt on top of the liquid base. Finally, add your choice of frozen fruit or ice cubes on top of everything.
- Pulse to Break Down Pulse the blender 3 to 5 times. You want to break up the large chunks of fruit/ice until the mixture looks chunky and crumbly. Do not panic if it looks dry here—this is normal!
- Blend and Tamp Turn the blender to High speed. Immediately use your tamper (the plastic stick) to push the ingredients vigorously down into the blades.
- The Texture Check Blend for 45-60 seconds total. Stop when the mixture has quadrupled in volume and looks glossy and smooth, like soft-serve. Dip a spoon in—if you can turn the spoon upside down and the ice cream doesn't fall, it is ready.
- Freeze (Optional for Scoops) For a soft-serve texture, eat immediately. For scoopable ice cream, transfer the mixture to a container and freeze for 20-30 minutes.
Notes
- Ninja Creami Instructions: If using a Ninja Creami, skip the ice/frozen fruit. Blend the dairy base, protein, and sweetener until smooth. Pour into a pint container and freeze for 24 hours. Spin on "Lite Ice Cream," add 1 tbsp milk, and "Re-Spin" for the perfect texture.
- Dairy-Free Option: Substitute cottage cheese with a high-protein vegan yogurt (like Siggi's Plant-Based) and use a vegan protein blend. You may need slightly less liquid.
- Why Cottage Cheese? It provides a cheesecake-like tang and a creamier texture than Greek yogurt due to the casein protein content. If you absolutely hate cottage cheese, you can swap it 1:1 for 2% Greek Yogurt.
- Storage: Best eaten fresh! If you must store it, press plastic wrap directly onto the surface of the ice cream before freezing to prevent freezer burn.